Snapshot Wisconsin Trail Camera Photos: The Complete Guide for Hunters & Wildlife Watchers

Snapshot Wisconsin Trail Camera Photos

Quick Answer: Snapshot Wisconsin is the Wisconsin Department of Natural Resources’ (DNR) citizen science program that uses trail camera photos submitted by hunters and landowners to track white-tailed deer populations, monitor wildlife health, and collect harvest data. Participants set up trail cameras on their property, photograph deer and other wildlife, and submit images through the DNR’s online portal. The data helps wildlife managers make smarter decisions about deer season regulations across the state.

Key Takeaways

  • Snapshot Wisconsin is a free, DNR-run program that turns trail camera photos into statewide wildlife population data.
  • Any Wisconsin resident with a trail camera can participate — no hunting license required.
  • Submitted photos are reviewed by volunteers and DNR staff who identify species, count animals, and flag health concerns.
  • The program focuses on white-tailed deer but also captures bears, turkeys, coyotes, and other species.
  • Snapshot Wisconsin trail camera photos have directly influenced deer season bag limits and antlerless permit allocations.
  • Participants receive access to aggregated data reports, making it useful for personal scouting as well as conservation.
  • Camera placement, timing, and SD card management are the biggest factors in photo quality and submission success.
  • The program runs year-round, but fall submissions (August–November) carry the most weight for deer management decisions.

What Is Snapshot Wisconsin and How Do Trail Camera Photos Fit In?

Snapshot Wisconsin is a collaborative wildlife monitoring program launched by the Wisconsin DNR. It collects trail camera photos from volunteer participants across the state to build a large-scale picture of wildlife activity, population trends, and animal health.

Trail cameras are the backbone of the program. Volunteers place cameras on their land, capture images of passing animals, and upload those photos to the DNR’s online platform. Trained volunteers and DNR biologists then classify the images—identifying species, estimating age and sex of deer, and noting any signs of disease like Chronic Wasting Disease (CWD).

Why it matters: Traditional population surveys rely on roadside counts and harvest reports, which have significant blind spots. Snapshot Wisconsin trail camera photos fill those gaps with ground-level data from private and public lands that biologists rarely access directly.

Who Can Participate in Snapshot Wisconsin?

Any Wisconsin resident or landowner can join the program at no cost. Participation does not require a hunting license, a specific land size, or prior wildlife knowledge.

Eligible participants include:

  • Deer hunters scouting their property
  • Landowners interested in wildlife on their land
  • Conservation-minded residents who want to contribute to science
  • Farmers monitoring crop damage from deer or bear

Who it’s NOT ideal for: Participants living in dense urban areas with little wildlife habitat, or those without a secure outdoor location to mount a camera. Trail cameras placed in high-traffic public areas also raise privacy concerns the DNR takes seriously—always confirm camera placement follows Wisconsin’s surveillance laws.

How to Submit Snapshot Wisconsin Trail Camera Photos

Snapshot Wisconsin Trail Camera Photos

Submitting photos is straightforward, but doing it correctly ensures your data actually gets used by DNR biologists.

Step-by-step process:

  1. Register at the Wisconsin DNR’s Snapshot Wisconsin portal (dnr.wisconsin.gov).
  2. Set up your trail camera at an approved location on land you own or have permission to use.
  3. Check and collect your SD card monthly, or more often during peak deer season.
  4. Upload images through the portal — the system accepts JPEG files and auto-tags location data if your camera records GPS coordinates.
  5. Classify images yourself (optional) or let volunteer classifiers handle it through the program’s crowd-sourced review system.
  6. Review your data — the portal shows you what species were detected on your property and when.

💡 Pro tip: Cameras with time-lapse mode capture more usable data than motion-only cameras during low-activity periods. Set your camera to capture at least one image per hour during daylight in addition to motion triggers.

Best Trail Camera Settings for Snapshot Wisconsin Trail Camera Photos

Camera settings directly affect photo quality, battery life, and the usefulness of your images to DNR classifiers.

Setting Recommended Value Why It Matters
Resolution 12MP or higher Allows accurate age/sex identification
Trigger speed 0.5 seconds or faster Captures full-body images, not just tails
Photo burst 3 images per trigger Reduces missed captures
Timestamp Always ON Required for DNR data logging
Detection range 60–80 feet Balances coverage with false triggers
Battery type Lithium AA Performs better in Wisconsin winters
SD card capacity 32GB minimum Holds enough images between monthly checks

Common mistake: Setting image resolution too low to save battery. DNR classifiers need to clearly see ear shape, antler development, and body condition. Blurry or small images get flagged as “unclassifiable” and don’t contribute to population data.

For hunters who also want to use their cameras for personal scouting, pairing a quality trail camera with a capable smartphone for reviewing images in the field is worth considering. Phones with strong cameras — like those reviewed in our camera category — can help you quickly assess image quality before leaving the field.

Where to Place Cameras for the Best Snapshot Wisconsin Trail Camera Photos

Camera placement determines whether you capture 10 usable images per month or 300. The DNR recommends sites that reflect typical wildlife movement rather than baited or artificially concentrated locations.

High-value placement locations:

  • Travel corridors: Fence lines, creek crossings, and field edges where deer move between bedding and feeding areas
  • Scrapes and rubs: Active scrape lines during October–November produce high deer-photo rates
  • Food plots and crop field edges: Consistent evening activity, especially August through December
  • Water sources: Underused by most hunters but effective during dry summers
  • Forest openings: Captures multiple species, including turkeys, bears, and coyotes

Placement rules that affect data quality:

  • Mount cameras 24–30 inches off the ground, angled slightly downward
  • Face cameras north or south to avoid sun glare washing out images at dawn and dusk
  • Clear brush within 10 feet of the lens to reduce false triggers from moving vegetation
  • Use a sturdy tripod or mounting system if tree mounting isn’t possible on your property

What Wildlife Shows Up in Snapshot Wisconsin Trail Camera Photos?

White-tailed deer dominate submissions, but the program captures a broad range of Wisconsin wildlife. DNR biologists use non-deer images for secondary research projects on predator-prey dynamics and habitat use.

Commonly photographed species:

  • White-tailed deer (primary focus — bucks, does, and fawns classified separately)
  • Wild turkey
  • Black bear
  • Coyote
  • Red and gray fox
  • Raccoon and opossum
  • Bobcat (rare but increasingly documented in northern Wisconsin)
  • Sandhill crane

Edge case: Wolves appear in trail camera photos from northern Wisconsin counties. If your camera captures a wolf, the DNR requests that you flag the image separately, as wolf sightings feed into a different monitoring program with federal reporting requirements.

How Snapshot Wisconsin Trail Camera Photos Influence Deer Management

This is where the program’s real value shows up. DNR wildlife managers use aggregated trail camera photo data to adjust antlerless deer permits, set season lengths, and monitor CWD spread.

Specific ways the data gets used:

  • Fawn recruitment rates: The ratio of fawns to does in late summer photos indicates how well the population is reproducing. A low fawn-to-doe ratio can trigger reduced antlerless permits the following season.
  • Buck-to-doe ratios: Helps managers assess hunting pressure and set harvest goals.
  • CWD surveillance: Deer showing signs of emaciation, stumbling, or abnormal behavior in trail camera photos are flagged for targeted testing in those zones.
  • Population trend tracking: Year-over-year photo submission data from the same camera sites shows whether local deer numbers are rising or falling.

“Trail camera data from citizen scientists gives us spatial coverage we simply can’t achieve with agency staff alone.” — Wisconsin DNR Wildlife Management (program documentation, dnr.wisconsin.gov)

For hunters who want to review large volumes of trail camera images efficiently, having a quality display matters. Reviewing photos on a high-resolution monitor makes it easier to spot details like CWD symptoms or antler characteristics before uploading.

Common Problems With Snapshot Wisconsin Trail Camera Photos (And How to Fix Them)

Even experienced hunters run into issues that reduce photo quality or prevent successful submission.

Problem 1: Blurry or overexposed images
Fix: Check your camera’s IR flash range. If deer are triggering the camera from beyond the flash’s effective range, images will be dark and grainy. Reposition the camera closer to the trail.

Problem 2: Too many false triggers (wind, grass)
Fix: Clear vegetation within 10 feet of the lens. Set sensitivity to “medium” rather than “high” in heavy brush areas.

Problem 3: The SD card is full before the monthly check
Fix: Use a higher-capacity card (64GB or 128GB) or increase the interval between time-lapse captures during slow periods.

Problem 4: Upload errors on the DNR portal
Fix: The portal has a 20MB per-image limit. If your camera shoots RAW or very high-resolution JPEG, compress the images before uploading. Most modern smartphones handle this automatically if you transfer photos through a USB-C cable to your computer for batch processing.

Problem 5: Camera stolen or vandalized
Fix: Use a security cable and lock box. Place cameras slightly off obvious trails so they’re not visible to casual passersby. The DNR does not reimburse for stolen equipment.

Snapshot Wisconsin Trail Camera Photos: Tips for Getting the Most From the Program

Participants who treat Snapshot Wisconsin as a two-way exchange — contributing quality data and using the program’s feedback — get the most value out of it.

Maximize your contribution:

  • Submit photos monthly rather than waiting until the end of the season. Early data helps DNR staff catch disease outbreaks faster.
  • Use at least two camera sites on your property to capture different habitat types.
  • Note unusual behavior in the photo comments field when uploading — this context helps classifiers.

Maximize your personal benefit:

  • Review your site’s species detection reports each season. Patterns in deer movement timing are directly useful for hunting strategy.
  • Compare your fawn-to-doe ratios against your county’s reported averages (available through the DNR portal) to understand local herd health.
  • Use the program’s historical data to identify long-term trends on your land — a declining deer detection rate over three years is a signal worth investigating.

If you’re building out a broader outdoor tech setup, a rugged smartphone designed for field use can make managing SD cards and uploading photos much easier during hunting season.

FAQ: Snapshot Wisconsin Trail Camera Photos

Q: Is Snapshot Wisconsin only for hunters?
No. Any Wisconsin resident with a trail camera and outdoor access can participate. The program welcomes landowners, naturalists, and conservation volunteers regardless of whether they hunt.

Q: Do I need to buy a special trail camera for the program?
No. Any trail camera that produces JPEG images with a time stamp works. Higher resolution cameras (12 MP+) produce more classifiable images, but there’s no required brand or model.

Q: How many photos should I expect to submit per month?
It varies by location and season. Active sites near food sources during October–November can generate 500–1,000+ images per month. Quieter sites in summer might produce 50–100.

Q: Can I use my Snapshot Wisconsin camera data for hunting scouting?
Yes. The data you collect is yours to use. Many hunters find the program’s detection reports and movement timing data directly useful for stand placement decisions.

Q: Does the DNR share my location data with the public?
No. Camera site locations are kept confidential. Aggregated data is reported at the county or deer management unit level, not by individual property.

Q: What happens if my trail camera photos show a deer with CWD symptoms?
Flag the image in the portal using the “health concern” tag. DNR staff will follow up and may request additional information about the specific location to prioritize targeted CWD testing in that area.

Q: How long does it take for my photos to be classified?
Volunteer classifiers typically review images within 2–4 weeks of submission. During peak fall season, the backlog can extend to 6–8 weeks.

Q: Can I participate if I only have access to public land?
The DNR prefers cameras on private land where placement can be controlled and monitored consistently. Public land camera placement requires a permit and is subject to additional restrictions. Check with your local DNR office before setting up on public land.

Q: Is there a minimum number of photos required to stay in the program?
No minimum is enforced, but the DNR encourages consistent monthly submissions. Sites that go inactive for more than one season may be removed from the active monitoring network.

Q: What file format should my photos be in?
JPEG is the required format. Most trail cameras shoot JPEG by default. RAW files are not accepted by the DNR portal.

Conclusion

Snapshot Wisconsin trail camera photos represent one of the most effective citizen science programs in the country for wildlife management. By contributing quality images from well-placed cameras, participants directly shape how Wisconsin manages its deer herd — from antlerless permit allocations to CWD response zones.

Actionable next steps for 2026:

  1. Register at the Wisconsin DNR’s Snapshot Wisconsin portal if you haven’t already.
  2. Audit your camera placement using the location guidelines above — small adjustments often double your usable photo count.
  3. Check your camera settings against the recommended table in this guide before the fall season begins.
  4. Submit monthly rather than in one end-of-season batch to maximize your data’s impact on real-time management decisions.
  5. Use your own data — review the species detection reports the portal generates and apply movement timing insights to your hunting strategy.

The program costs nothing to join and takes minimal time to maintain. The return, both for Wisconsin’s wildlife and for your own understanding of what’s happening on your land, is substantial.

Sources

  • Wisconsin Department of Natural Resources, Snapshot Wisconsin Program Overview — dnr.wisconsin.gov (2023)
  • Wisconsin DNR, Deer Management Reports and CWD Surveillance Documentation — dnr.wisconsin.gov (2024)
  • Snapshot Wisconsin Volunteer Classifier Training Materials — Wisconsin DNR (2022)
Best Budget Mirrorless Cameras in 2026: Top Picks for Every Shooter

Best Budget Mirrorless Cameras in 2026

Quick Answer

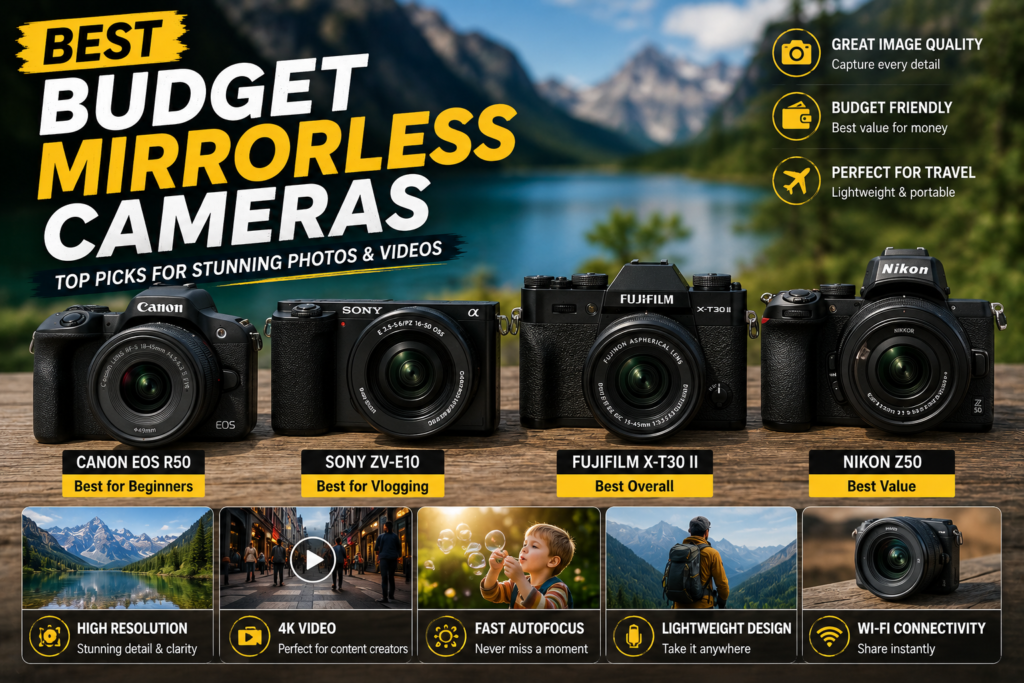
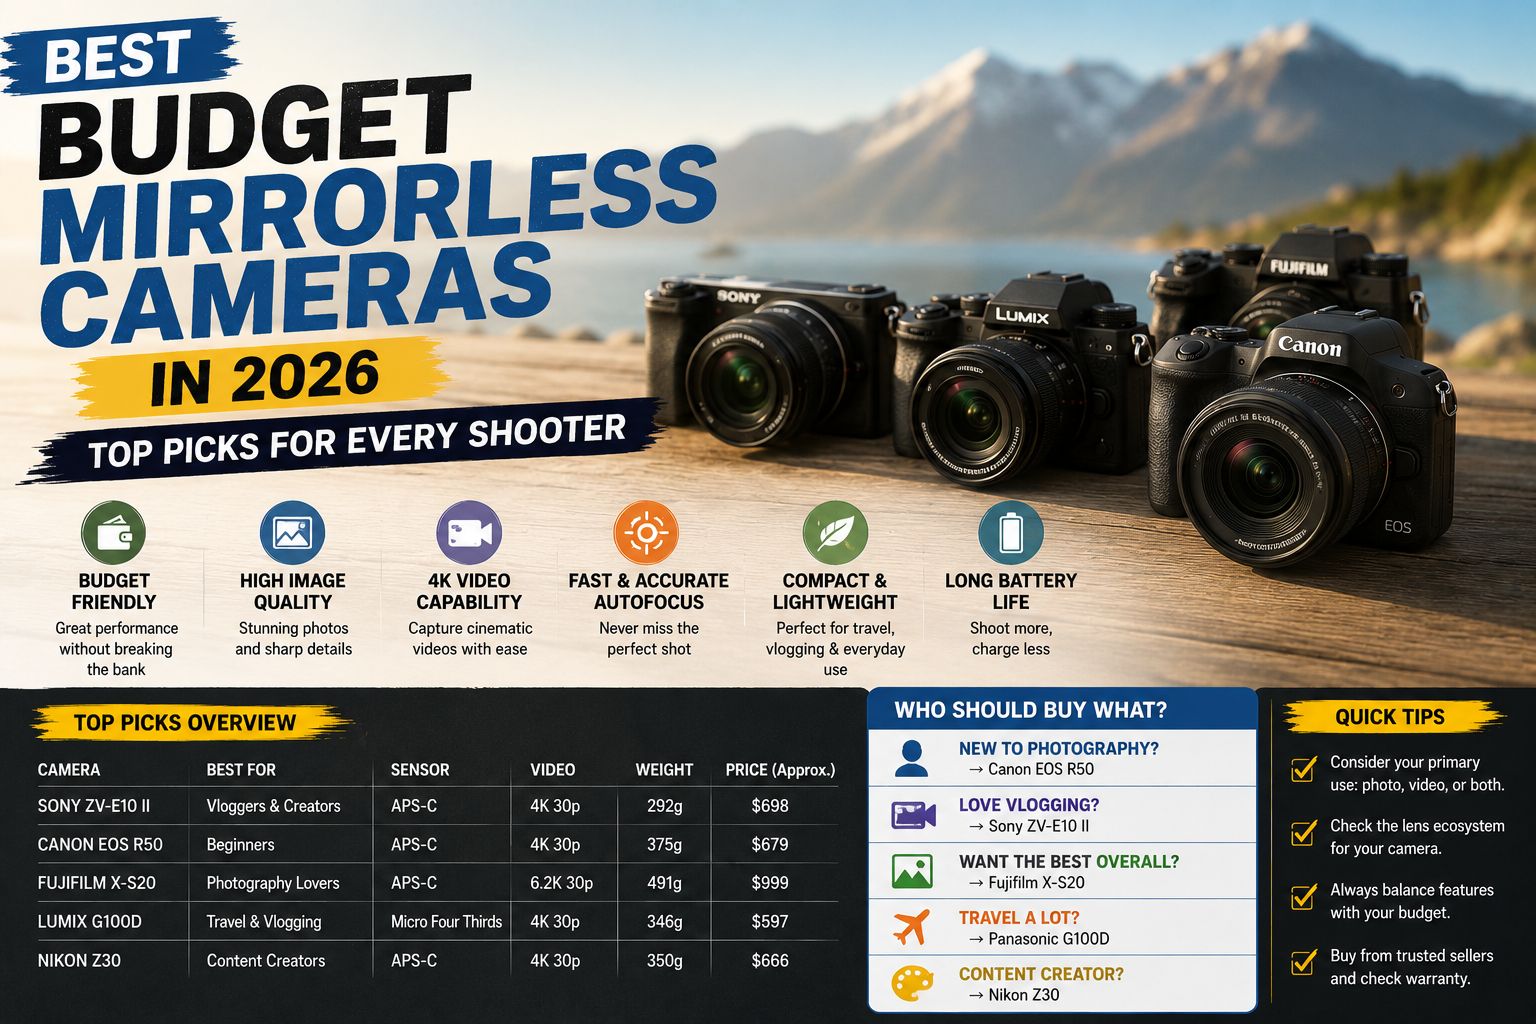
The best budget mirrorless cameras in 2026 fall in the $400–$900 range and include the Sony ZV-E10 II, Fujifilm X-S20, Canon EOS R50, and Nikon Z30. These cameras feature APS-C sensors, 4K video, and interchangeable lenses at a price lower than full-frame bodies. For most beginners and hobbyists, any of these options will outperform a smartphone camera by a wide margin.

Key Takeaways 📷

  • Budget mirrorless cameras typically cost between $400 and $900 for the body only in 2026.
  • APS-C sensors dominate this price range and deliver excellent image quality for stills and video.
  • The Sony ZV-E10 II, Canon EOS R50, Fujifilm X-S20, and Nikon Z30 are the top picks for most buyers.
  • Lens ecosystem matters as much as the camera body—factor in future lens costs before buying.
  • 4K video recording is now standard, even at entry-level prices.
  • In-body image stabilization (IBIS) is rare below $700; expect electronic stabilization instead.
  • Beginners benefit most from cameras with guided shooting modes and strong autofocus.
  • Content creators should prioritize flip screens, USB-C charging, and clean HDMI output.
  • Mirrorless cameras are lighter and more compact than DSLRs, making them great for travel.
  • Pairing a camera with a stable phone tripod works well for solo shooting setups.

What Makes a Mirrorless Camera “Budget” in 2026?

A mirrorless camera qualifies as budget-friendly when it costs under $900 body-only and doesn’t require expensive proprietary accessories to function well. In 2026, this price band delivers genuinely capable hardware — not stripped-down compromises.

Key characteristics of budget mirrorless cameras:

  • Sensor size: APS-C (most common) or Micro Four Thirds
  • Price range: $400–$900 body-only
  • Video: 4K at 24/30fps, often with a crop
  • Autofocus: Phase-detect or hybrid AF with subject tracking
  • Build: Polycarbonate body (not weather-sealed at most price points)
  • Stabilization: Electronic or lens-based (IBIS rare under $700)

Who this is NOT for: Professional photographers needing weather sealing, full-frame dynamic range, or high-speed burst shooting should budget $1,200 or more.

Visit Amazon: https://amzn.to/3QVInES

Which are the best budget mirrorless cameras right now?

The best budget mirrorless cameras in 2026 are the Sony ZV-E10 II, the Canon EOS R50, the Fujifilm X-S20, and the Nikon Z30. Each targets a slightly different type of shooter, so the “best” one depends on your priorities.

📊 Top Budget Mirrorless Cameras Compared (2026)

Camera Price (Body) Sensor 4K Video IBIS Best For
Sony ZV-E10 II ~$500 APS-C Yes (4K/30p) No Vloggers, content creators
Canon EOS R50 ~$680 APS-C Yes (4K/30p) No Beginners, photo/video hybrid
Fujifilm X-S20 ~$800 APS-C Yes (6.2K/30p) Yes Enthusiasts, film simulation fans
Nikon Z30 ~$630 APS-C Yes (4K/30p) No Video-first creators
OM System OM-5 ~$900 MFT Yes (4K/30p) Yes Outdoor/travel shooters

Choose the Sony ZV-E10 II if you want the lightest, most vlog-friendly body with a massive lens selection through Sony’s E-mount ecosystem.

Choose the Fujifilm X-S20 if you want in-body stabilization, exceptional film simulations, and the best still-image color science in this price range.

Choose the Canon EOS R50 if you’re new to photography and want Canon’s intuitive menus, strong autofocus, and a large support community.

Choose the Nikon Z30 if you shoot video primarily and want a clean, no-viewfinder design optimized for vlogging and streaming.

What Should You Look for When Buying a Budget Mirrorless Camera?

Best Budget Mirrorless Cameras

The right budget mirrorless camera depends on five core factors: sensor quality, autofocus performance, video specs, lens ecosystem, and ergonomics. Prioritizing all five equally is a mistake — rank them by your actual use case first.

The 5 Factors That Matter Most

  1. Sensor size and resolution — APS-C sensors (around 24MP) handle low light well and produce files with plenty of detail for printing and cropping.
  2. Autofocus system — Look for phase-detect AF with eye/face tracking. This makes a real difference for portraits, run-and-gun video, and action shots.
  3. Video capabilities — 4K is the baseline in 2026. Check for overheating limits, rolling shutter performance, and whether the camera supports clean HDMI output for external recording.
  4. Lens ecosystem — A cheap body paired with expensive lenses defeats the purpose. Sony E-mount, Canon RF-S, and Nikon Z all have affordable kit lens options, but long-term costs vary.
  5. Ergonomics and interface — A camera you enjoy using gets used more. Flip screens, physical dials, and intuitive menus matter more than spec sheets suggest.

Common mistake: Buying a camera body without researching the cost of a second lens. The kit lens is fine to start, but a fast 35mm or 50mm prime can cost $150–$400, depending on the system.

Are Budget Mirrorless Cameras Good Enough for Video?

 Budget Mirrorless Cameras
Budget Mirrorless Cameras

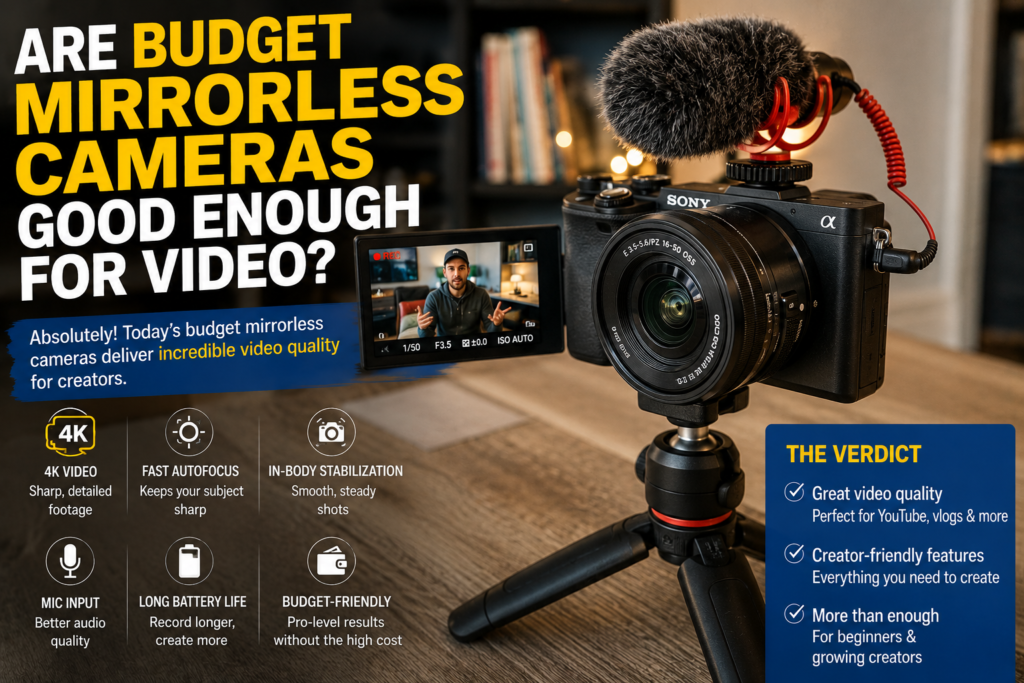
Yes—the best budget mirrorless cameras in 2026 are more than capable for YouTube, social media, and even short film production. 4K video is standard across all major budget models, and most support USB-C charging, which simplifies on-location power management.

What you get at this price:

  • 4K/30p video (some models offer 4K/60p with a crop)
  • Continuous autofocus with subject tracking
  • Microphone input (3.5mm jack on most models)
  • Flat/log picture profiles for colour grading (varies by model)

What you may miss:

  • 10-bit colour depth (usually reserved for $1,000+ cameras)
  • Unlimited recording time (some budget cameras have 30-minute limits)
  • Full-size HDMI port (micro-HDMI is common at this price)

For creators who also want to capture high-quality wireless audio, pairing a budget mirrorless camera with a wireless microphone like the Mini Mic Pro significantly improves production value without a large investment.

How Do Budget Mirrorless Cameras Compare to Budget Smartphones?

Budget mirrorless cameras outperform smartphones in optical zoom, low-light performance, and creative control, but smartphones win on convenience, connectivity, and computational photography. For most casual users, a smartphone is sufficient — but for anyone serious about photography or video quality, a mirrorless camera is worth the upgrade.

Feature Budget Mirrorless Budget Smartphone
Low-light performance Much better Decent with AI processing
Optical zoom Yes (with the right lens) Limited or simulated
Sensor size APS-C (much larger) 1/2″ or smaller
Creative control Full manual control Limited
Portability Moderate Excellent
Connectivity SD card + USB Instant cloud sharing

For reference, even a capable budget phone like the Motorola Moto G 2026 or the Google Pixel 7 5G produces impressive photos—but neither matches a mirrorless camera with a good prime lens in challenging light.

What Lenses Should You Buy With a Budget Mirrorless Camera?

Start with the kit lens (usually an 18-45mm or 16-50mm zoom), then add a fast prime lens as your second purchase. A 35mm f/1.8 or 50mm f/1.8 in your camera’s native mount typically costs $150–$300 and dramatically improves low-light and portrait performance.

Recommended Starter Lens Kits by System

Sony E-mount:

  • Kit: Sony 16-50mm f/3.5-5.6 (included with ZV-E10 II kit)
  • Second lens: Sony 35mm f/1.8 OSS (~$250)

Canon RF-S:

  • Kit: Canon RF-S 18-45mm f/4.5-6.3 (included with R50 kit)
  • Second lens: Canon RF 50mm f/1.8 STM (~$200)

Fujifilm X-mount:

  • Kit: Fujinon XC 15-45mm f/3.5-5.6 OIS
  • Second lens: Fujinon XF 35mm f/2 R WR (~$300)

Nikon Z:

  • Kit: Nikkor Z DX 16-50mm f/3.5-6.3 VR
  • Second lens: Nikkor Z 40mm f/2 (~$280)

Edge case: If you’re switching from a DSLR, check whether your existing lenses are compatible with an adapter before committing to a new system. Canon EF lenses adapt well to the RF mount; Nikon F lenses adapt to the Z mount with full AF support.

What Are the Most Common Mistakes When Buying a Budget Mirrorless Camera?

The biggest mistakes are buying based solely on megapixel count, ignoring the lens ecosystem, and underestimating the importance of ergonomics. A 24MP camera with a sharp, fast lens will always outperform a 32MP camera with a slow kit lens.

Mistakes to Avoid

  • Chasing specs over usability: A camera with complex menus you never learn to use is a wasted investment.
  • Ignoring battery life: Budget mirrorless cameras typically get 300–400 shots per charge. Buy a spare battery from day one.
  • Skipping a memory card budget: Fast UHS-I or UHS-II SD cards are essential for 4K video. Slow cards cause dropped frames.
  • Buying the wrong mount: Switching systems later means replacing all your lenses. Research the ecosystem before committing.
  • Overlooking used/refurbished options: Certified refurbished cameras from Sony, Canon, and Nikon often cost 20–30% less with a full warranty.

Best Budget Mirrorless Cameras for Specific Use Cases

Not every shooter has the same needs. Here’s a quick decision guide based on how you plan to use your camera most.

For travel photography: Fujifilm X-S20 (IBIS, compact body, and excellent JPEGs straight from the camera) or OM System OM-5 (weather-sealed, very compact). A sturdy tripod is a useful companion for landscape and long-exposure shots.

For YouTube and vlogging: Sony ZV-E10 II or Nikon Z30 (both optimized for front-facing content, with flip screens and strong continuous AF).

For portrait photography: the Canon EOS R50 (excellent skin tones and reliable eye-tracking AF) or the Fujifilm X-S20 (film simulations produce beautiful, natural portraits).

For wildlife and sports: Any of the above with a telephoto lens, though note that budget bodies have slower burst speeds (typically 11–15 fps) compared to mid-range options.

For beginners, the Canon EOS R50 has the most beginner-friendly interface, guided modes, and an extensive online learning community.

For more tech buying decisions across categories, the TechnoItem camera category offers a wide range of reviews of photography and videography gear.

Conclusion: Which Budget Mirrorless Camera Should You Buy?

The best budget mirrorless cameras in 2026 make serious photography accessible without a serious price tag. The right choice comes down to your primary use case:

  • Vloggers and content creators → Sony ZV-E10 II
  • Beginners and photo/video hybrid shooters → Canon EOS R50
  • Enthusiasts who want the best image quality → Fujifilm X-S20
  • Video-first creators → Nikon Z30
  • Outdoor and travel shooters → OM System OM-5

Actionable next steps:

  1. Decide whether stills or video is your primary use—this immediately narrows your choice.
  2. Set a total budget that includes a body, a kit lens, one prime lens, a spare battery, and a fast SD card.
  3. Visit a camera store (if possible) to handle the body before buying — ergonomics matter.
  4. Buy from a retailer that offers a return window so you can test the camera in real conditions.
  5. Start shooting on auto, then gradually move to aperture priority as you build confidence.

The best camera is the one you’ll actually carry and use. At these price points, any of the top picks above will produce images that would have required a professional camera just five years ago.

Frequently Asked Questions

What is the best budget mirrorless camera for beginners in 2026?

The Canon EOS R50 is the top pick for beginners. It has guided shooting modes, reliable eye-tracking autofocus, and one of the most intuitive menu systems in this price range.

Can a budget mirrorless camera shoot professional-quality photos?

Yes, for most professional applications, including portraits, events, and product photography. The limiting factor is usually the lens, not the camera body.

Is a mirrorless camera better than a DSLR for beginners?

Generally yes. Mirrorless cameras are lighter, offer real-time exposure preview through the electronic viewfinder, and have better video autofocus. DSLRs still have longer battery life and a wider used-lens market.

What sensor size do budget mirrorless cameras use?

Most budget mirrorless cameras use APS-C sensors. A few use Micro Four Thirds (MFT). Full-frame sensors are rarely available for under $1,200.

Do budget mirrorless cameras overheat during video recording?

Some do, especially during extended 4K recording in warm environments. The Sony ZV-E10 II and Nikon Z30 have better-than-average heat management for this price range. Always check real-world recording limits before buying.

Is 4K video available on budget mirrorless cameras?

Yes—4K video is standard on all major budget mirrorless models in 2026, though some models apply a crop factor at 4K.

What accessories do I need with a budget mirrorless camera?

At minimum: a spare battery, a fast SD card (UHS-I V30 or better), a UV filter to protect the lens, and a camera bag. A tripod is useful for video and long-exposure work.

How long do budget mirrorless cameras last?

Most are rated for 100,000–200,000 shutter actuations. For casual shooters taking a few hundred photos per week, a well-maintained budget mirrorless camera can last 5–10 years.

Should I buy a kit lens or a body-only lens?

Buy the kit. Kit lenses have improved significantly, offering a versatile starting point. Buying a body only makes sense if you already own compatible lenses.

Are budget mirrorless cameras weather-sealed?

Rarely below $800. The OM System OM-5 is a notable exception at around $900. Most APS-C budget bodies are polycarbonate with no weather sealing.

Sources

Best Computer Desk With Drawers in 2026: Top Space-Saving Picks

Computer Desk With Drawers

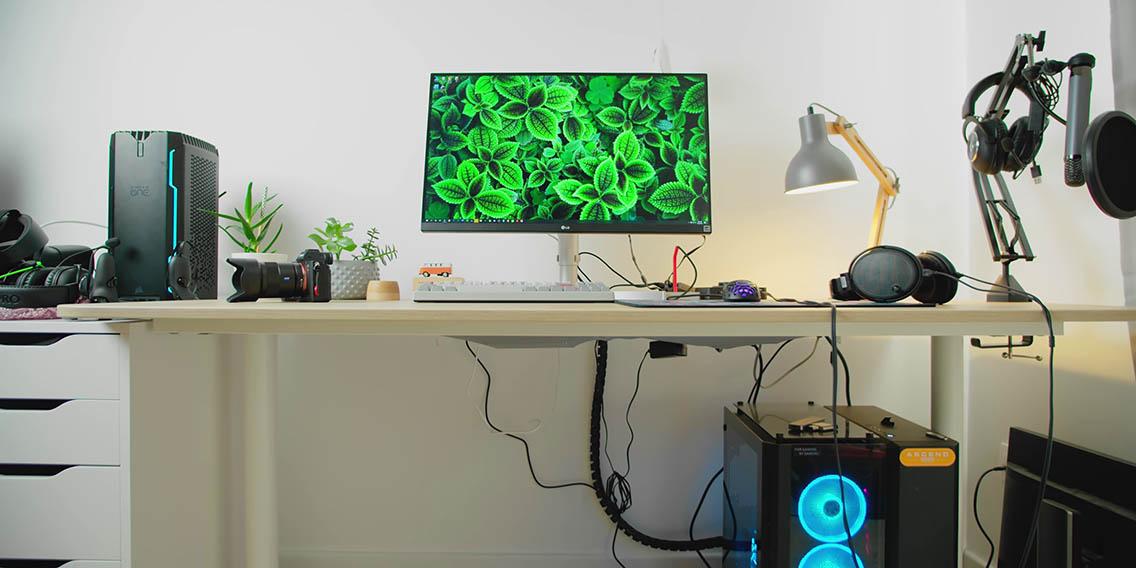
Let’s be honest for a second. Finding the perfect desk is about much more than just picking something that looks nice online. If you sit down to work or game, and your desk is covered in tangled chargers, old sticky notes, and random paperwork, your focus takes a massive hit before you even start.

I’ve built and tested dozens of workspace layouts over the years. I’ve used cheap particleboard tables that wobble every time I type, and I’ve used premium setups that cost a fortune. The one thing I’ve learned? Small details—like drawer placement, knee clearance, and material quality—completely change how you feel while working.

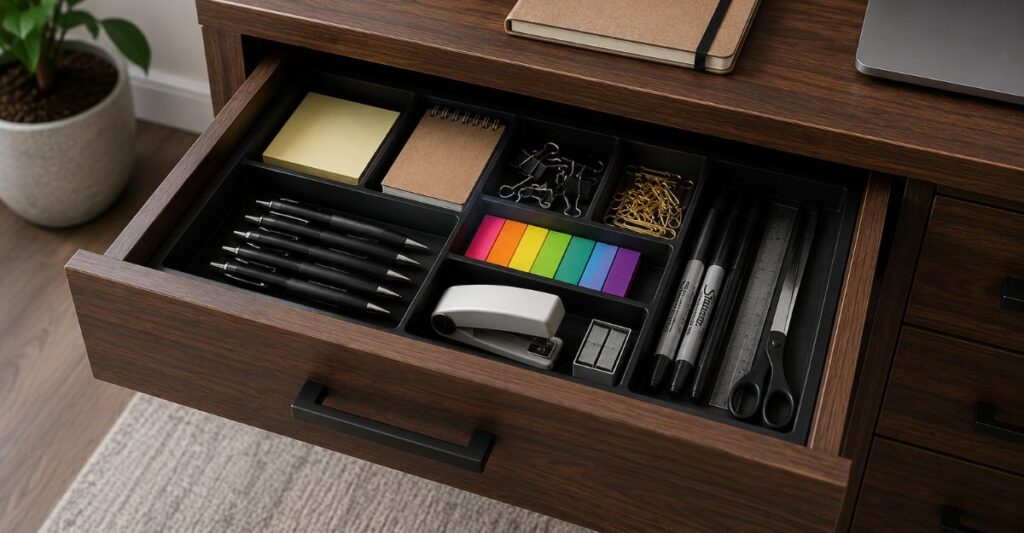
Upgrading to a computer desk with drawers is the easiest way to take your sanity back. Instead of leaving everything scattered across the surface, you get dedicated storage to hide the mess.

Whether you’re setting up a home office, a gaming station, or a tiny apartment study corner, this guide covers everything you need to know to find the perfect fit for 2026. Let’s clear the clutter.

⚡ Quick Answer & Key Takeaways

Don’t have time to read the whole guide? Here is the rapid-fire advice you need before you buy:

  • Our #1 Overall Pick: After comparing build quality, legroom, and storage depth, our top recommendation is this Top-Rated Desk with Drawers on Amazon. It balances sturdy construction with deep drawers to keep everyday essentials out of sight.
  • Measure your chair: Always check the “knee clearance” so the armrests of your office chair actually fit underneath the drawers.
  • The sweet spot: A 48 to 60-inch desktop is the perfect size for most home offices and dual-monitor setups.
  • Material matters: Solid wood handles heavy PC towers without bowing, while a metal frame with engineered wood offers the best budget value.

📊 2026 Desk Comparison Table

Choosing the right desk is much easier when you compare the features side by side. Here is what you can generally expect across different price ranges.

Desk Category Frame Material Storage Capacity Weight Limit Best For…
Budget Friendly Engineered Wood 1–2 Slim Drawers Up to 100 lbs Students & Laptops
Mid-Range (Recommended) MDF + Steel Frame 2–4 Drawers + Shelves 100–180 lbs Home Office & Dual Monitors
Premium / Executive Solid Wood or Veneer Multiple Drawers + File Cabinet 180+ lbs Professionals & Heavy Gear

🛋️ Exploring the Best Desk Styles

Not everyone needs the exact same desk. Choosing a model that matches your room layout and daily routine makes all the difference. Let’s look at the most popular styles.

1. The L-Shaped Computer Desk With Drawers

L-Shaped Computer Desk With Drawers

If you have the room for it, an L-shaped computer desk with drawers is arguably the best investment you can make. It utilizes empty corner space brilliantly. When I set up my own L-shaped desk, it completely changed my workflow. I put my dual monitors and mechanical keyboard on the long side, and used the shorter side strictly for writing and charging my wireless accessories. It’s perfect for gamers, programmers, and multitaskers who need to separate their digital work from their physical paperwork.

2. The Small Computer Desk With Drawers

Student Desk With Drawers

Not everyone has a massive dedicated office. If you live in an apartment or a dorm or are squeezing a workspace into your bedroom, you need a small computer desk with drawers. These usually sit between 35 and 47 inches wide. While you won’t fit three monitors on them, a compact desk gives you exactly enough room for a laptop, a coffee mug, and a desk lamp. The built-in drawer is a lifesaver for hiding your mouse and notebooks when the workday is over.

3. The White Computer Desk With Drawers

Aesthetics matter. A white computer desk with drawers remains one of the most popular choices for modern, minimalist home offices and content creators. White finishes reflect natural light, making cramped rooms feel much bigger. Just keep in mind that white shows dust and coffee rings easily, so you might want to protect the surface with a high-quality extended desk mat.

4. The Computer Desk With Drawers Wooden

If you want something that won’t fall apart when you move to a new house, a wooden computer desk with drawers is incredibly hard to beat. Solid oak, walnut, or high-grade pine provides massive stability. When you put a heavy 32-inch monitor and a massive gaming PC on a cheap desk, it bows in the middle. Wood prevents that. It ages beautifully and acts as a long-term investment for your workspace.

🛒 The Ultimate Buying Guide

Before you hit “add to cart,” run through this checklist to make sure you aren’t making a common buying mistake.

Finding the Best Size

Desk size should match your workflow.

  • 35–40 inches: Strictly for laptops and tight spaces.
  • 47–55 inches: The standard home office size. Fits one monitor and a laptop easily.
  • 60+ inches: Required if you run dual monitors, heavy studio speakers, or advanced gaming setups. Always leave about 30 inches of walking clearance behind your chair!

Choosing the Best Material

  • Solid Wood: Expensive and heavy, but incredibly durable.
  • Engineered Wood (MDF): Very affordable and looks great, but vulnerable to water damage if you spill a drink.
  • Metal Frames: Provide the best “wobble-free” typing experience. A steel frame paired with a wooden top is the ideal combination for most buyers.

Standing Desk vs Regular Desk

Many buyers get stuck deciding between a motorized standing desk and a traditional desk.
The biggest difference in the standing desk vs. regular desk debate is storage. Motorized standing desks need a metal crossbar underneath to lift the table. Because of this mechanism, they almost never have deep, built-in drawers. You have to buy a separate rolling file cabinet.
Regular desks are the kings of storage. If hiding clutter is your main goal, stick to a regular desk. (You can always buy an adjustable monitor riser to stand up when you want to.

📦 Our Top Recommendation

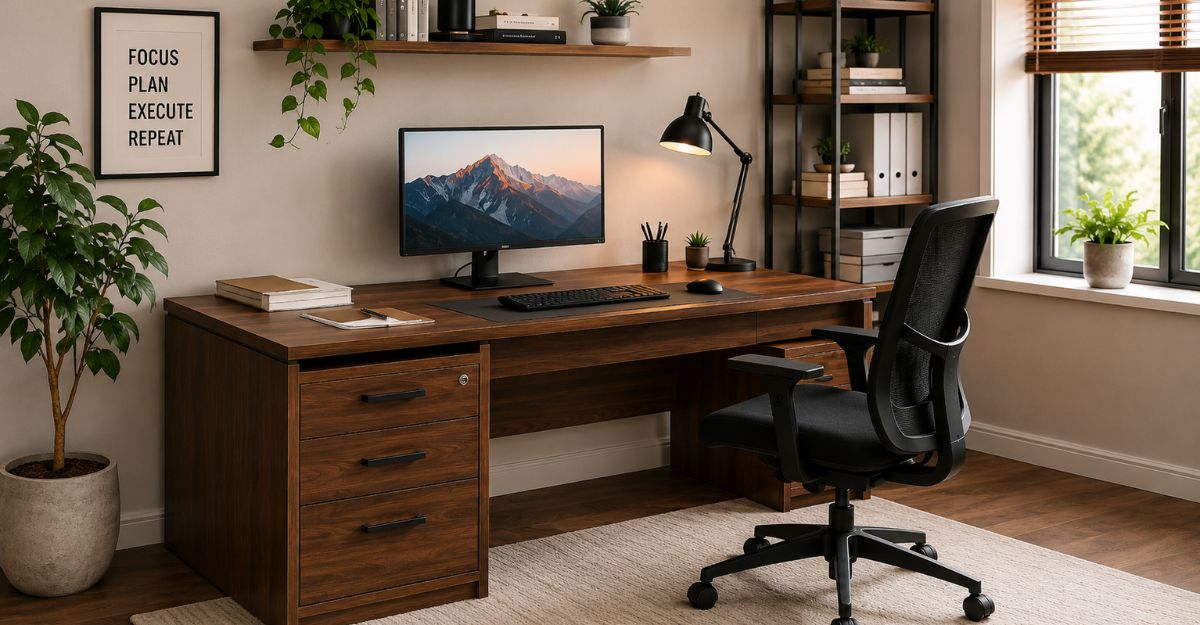
home office desk
: home office desk


After looking at dozens of brands, reviewing weight capacities, and checking drawer slides, here is our current top pick:

👉 Editor’s Choice: Grab the Best Computer Desk with Drawers on Amazon Here

Why We Like It:

  • Offers an incredibly spacious desktop without feeling bulky.
  • The drawers use smooth metal tracks, not cheap plastic ones that get stuck.
  • The frame is reinforced, meaning it won’t shake while you are typing heavily or gaming.
  • Tip before buying: Assembly takes about an hour, so we recommend grabbing a power drill on a low-torque setting to speed things up!

🔌 Workspace Setup & Cable Management Tips

Buying the desk is only step one. Setting it up properly is what actually boosts your productivity.

  1. Hide the Wires: A beautiful desk looks terrible if a rat’s nest of cables hangs down the back. Buy some cheap cable clips or an under-desk wire tray. Route your power strips behind the drawers. For more tips, read our guide on advanced cable management.
  2. Lighting is Everything: Try to put your desk near a window for natural light. If you work at night, grab a screen light bar to reduce eye strain.
  3. Protect the Top: Use coasters. If you buy an engineered wood desk, a single condensation ring from a cold glass of water can cause the wood to bubble.

❓ FAQ: People Also Ask

What is the best computer desk with drawers for a home office?
For most home setups, a 48 to 55-inch desk with a steel frame, a spacious desktop, and at least two storage drawers is ideal. It provides enough room for a monitor and a laptop while keeping your pens and papers hidden.

Is an L-shaped computer desk better than a regular desk?
It depends on your room. An L-shaped desk is vastly superior if you use dual monitors, want to separate your writing space from your typing space, or have an empty corner to fill. However, a regular desk is much better for small apartments.

How do I fix a desk drawer that keeps getting stuck?
If your drawer uses metal rolling tracks, wipe them clean with a paper towel and apply a tiny drop of WD-40 to the wheels. If it uses wooden slides, rub a plain wax candle or a bar of soap along the runners so it glides smoothly.

Can a computer desk with drawers support a heavy gaming PC?
Most mid-range to premium desks can easily hold a heavy PC tower. However, check the weight capacity first. If your desk is rated for less than 100 lbs, you should place your heavy PC tower on a floor stand to protect the wood and free up desktop space.

🏁 Final Verdict

A computer desk with drawers isn’t just a piece of furniture—it is the foundation of your entire daily workflow. Whether you are a remote worker, a student, or a late-night gamer, hiding your clutter inside built-in drawers instantly makes your space feel larger and your mind feel sharper.

Take the time to measure your room, match the desk to your setup (like picking an L-shape for multiple monitors), and invest in sturdy materials.

Ready to finally get organized? Click here to check out our top-rated desk pick on Amazon and start building a workspace you actually enjoy sitting at.

Author Box

Reviewed by: Shahadat

Technology & Workspace Content Writer

Shahadat specializes in home office setups, consumer technology, and productivity accessories. His buying guides focus on practical advice, real-world usability, and helping readers choose products that deliver long-term value rather than simply following trends.

All-in-One Gaming PC: The Revolutionary Space-Saving Powerhouse for Gamers

All-in-One Gaming PC

All-in-one gaming PC setups are quietly changing how people play at home. They don’t draw much attention, but they make things easier, cleaner, and honestly, just more enjoyable.

When you use an all-in-one gaming PC, you simply sit down, turn it on, and there’s nothing to distract you. No messy cables or bulky hardware in the way. It’s just a smooth, focused gaming experience that feels right.

Once you get used to an all-in-one gaming PC, it’s hard to go back.

Visit Amazon:https://amzn.to/4n3WILc

Key Takeaways

  • An all-in-one gaming PC combines performance and design in a single device.
  • Ideal for gamers who want a clean and organized workspace
  • Capable of running modern games with solid performance
  • Easy to set up and maintain without technical complexity
  • Works well for gaming, work, and creative tasks

All in One Gaming PC: A Story About How I Reclaimed My Gaming Space (and My Sanity)

All-in-One Gaming PC wasn’t something I ever thought I would seriously consider—until one quiet evening when everything in my setup decided to fail me at once.

I didn’t realize how chaotic my setup had become until that moment.

My desk was a battlefield. Wires tangled like vines. A bulky tower was humming loudly under the table. A separate monitor, speakers, external cooling fans, and a power strip that looked like it was plotting something dangerous. It worked, sure. But it didn’t feel right anymore.

Gaming used to be my escape. That night, it felt like maintenance work.

That was the moment I started searching for something better. Something simpler. Something powerful but clean. And that’s when I seriously began exploring the idea of an all-in-one gaming PC.

At first, I was skeptical. I had always associated all-in-one systems with basic office use, not serious gaming. But curiosity got the better of me. And honestly, that curiosity changed everything.

What Exactly Is an All-in-One Gaming PC?

Before I go further, let me explain what I discovered.

An all-in-one gaming PC is exactly what it sounds like. Instead of having a separate tower and monitor, everything is built into a single unit. The display, processor, GPU, cooling system, and speakers are all integrated into one sleek design.

At first glance, it almost feels too simple. But that simplicity is exactly where its strength lies.

No clutter. No mess. No unnecessary components.

Just plug in, power on, and you’re ready.

The Turning Point: Why I Decided to Switch

I didn’t switch immediately. I hesitated.

I asked myself all the usual questions:

  • Would it be powerful enough?
  • Would it overheat?
  • Could it really handle modern games?

But the more I researched, the more I realized something important.

Gaming had evolved. Hardware had evolved. And I hadn’t caught up.

Manufacturers had started building all-in-one gaming PC systems with high-end processors, dedicated graphics, and surprisingly efficient cooling solutions. These weren’t office machines pretending to be gaming rigs. They were real contenders.

So I leaped.

The First Day: A Different Kind of Setup Experience

When my new system arrived, the difference was immediate.

No heavy tower to lift.

No guessing which cable goes where.

I placed it on my desk, plugged in a single power cable, connected my peripherals, and that was it.

Done.

I actually sat there for a minute, waiting for something to go wrong. But nothing did.

It felt… peaceful.

Performance: The Moment of Truth

Of course, none of that mattered if it couldn’t perform.

So I launched my favorite games. The ones that usually pushed my old setup to its limits.

And here’s what surprised me.

It didn’t struggle.

Frame rates were smooth. Load times were fast. Even during intense scenes, everything held steady.

That’s when I realized something important: the All-in-One Gaming PC wasn’t trying to replace traditional setups. It was redefining them.

The Hidden Advantage: Space and Focus

This is something I didn’t expect.

When I cleared out my old system, my desk suddenly felt… bigger.

Not just physically, but mentally.

There were no distractions. No noise from a bulky tower. No heat blowing against my legs.

Just a clean, focused environment.

And oddly enough, it changed how I played.

I became more immersed. More present. More connected to the game.

Design That Actually Matters

I used to think design didn’t matter for gaming.

Performance was everything.

But now I see it differently.

An all-in-one gaming PC doesn’t just sit on your desk. It becomes part of your space.

The slim profile. The minimal cables. The modern aesthetic.

It feels intentional.

And when your setup feels intentional, you use it differently. You respect it more. You enjoy it more.

Cooling and Noise: The Silent Upgrade

One of my biggest concerns was heat.

Gaming PCs generate a lot of it. And with everything packed into one unit, I expected problems.

But I was wrong.

Modern cooling systems in these machines are surprisingly efficient. Smart airflow design, advanced fans, and optimized components all work together quietly in the background.

And the best part?

The noise is minimal.

No more constant humming. No more sudden fan spikes that break immersion.

Just a quiet performance.

Who Is an All-in-One Gaming PC Really For?

This is where things get interesting.

After using one for a while, I started to understand who this type of setup is perfect for.

Gamers with Limited Space

If you’re working with a small desk or a compact room, this is a game-changer.

Minimalists

If you hate clutter and love clean setups, you’ll appreciate every inch of this design.

Casual to Mid-Core Gamers

If you want strong performance without building or maintaining a complex system, this is a perfect fit.

People Who Value Simplicity

Not everyone wants to spend hours upgrading parts or managing cables.

Sometimes, you just want to play.

But Let’s Be Honest: It’s Not Perfect

I won’t pretend it’s flawless.

There are trade-offs.

Limited Upgradability

Unlike traditional desktops, upgrading components can be difficult or even impossible.

Higher Initial Cost

You’re paying for design, integration, and convenience.

Less Customization

You don’t get the same flexibility as building your own rig.

But here’s the thing.

Not everyone needs those features.

And once I accepted that, these drawbacks stopped feeling like problems.

How It Changed My Daily Routine

This part surprised me the most.

My gaming sessions became more spontaneous.

Before, I had to “prepare.” Turn everything on. Adjust settings. Deal with small annoyances.

Now?

I just sit down and play.

That simplicity removed friction. And removing friction made gaming fun again.

A Different Kind of Power

When people talk about gaming PCs, they usually focus on raw specs.

More RAM. Faster GPU. Higher benchmarks.

But the all-in-one gaming PC introduced me to a different kind of power.

The power of simplicity.

The power of focus.

The power of a setup that works with you, not against you.

Would I Go Back?

Honestly?

No.

Not because traditional gaming PCs are bad. They’re still incredibly powerful and customizable.

But for me, this feels better.

Cleaner.

Smarter.

More aligned with how I actually live and play.

Final Thoughts: Is It Worth It?

If you’re someone who:

  • Feels overwhelmed by clutter
  • Wants a clean, efficient setup
  • Values convenience without sacrificing performance

Then an all-in-one gaming PC might be exactly what you need.

It’s not about replacing the old way.

It’s about offering a new one.

And sometimes, a new way is exactly what you didn’t know you were looking for.

HP Pavilion All-in-One Desktop – Powerful Performance & Sleek Space-Saving Design

HP Pavilion All-in-One Desktop

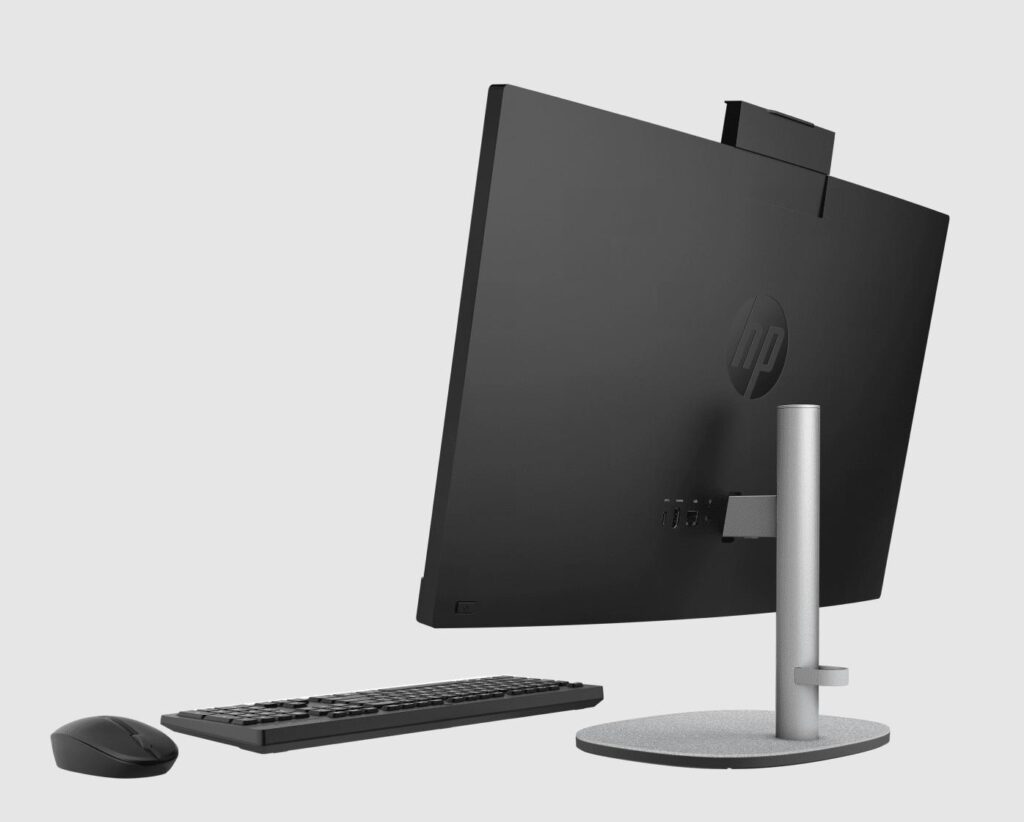
The HP Pavilion All-in-One Desktop is a smart choice for anyone who wants a simple and clutter-free workspace. Instead of dealing with a separate CPU and a tangle of wires, this all-in-one design keeps everything neatly built into the display. It creates a clean desk environment that helps you stay focused and organized throughout the day.

One of the biggest advantages of the HP Pavilion All-in-One Desktop is how easy it is to set up. You just plug it in, connect your keyboard and mouse, and you’re ready to go. There’s no need for complicated installation, which makes it ideal for students, home users, or anyone who prefers a hassle-free experience.

The design is not just about looks; it also improves productivity. A tidy workspace can make a big difference in how you work and think. With fewer distractions, it becomes easier to concentrate on tasks like studying, office work, or even browsing and entertainment.

Another benefit of the HP Pavilion All-in-One Desktop is its modern and space-saving style. It fits comfortably in small rooms, home offices, or even shared spaces without taking up much space. If you want a reliable computer that combines performance with simplicity, this desktop offers a balanced and practical solution for everyday use.

Visit Amazon: https://amzn.to/4ugRwGm

Why the HP Pavilion All-in-One Desktop Is Worth Considering

If you want a computer that works smoothly without unnecessary complications, the HP Pavilion All-in-One Desktop is a solid choice. It keeps things simple while still delivering reliable performance for everyday use. You can open multiple browser tabs, create documents, join video calls, or stream your favorite content without dealing with lag or frustration. Everything runs in a way that feels natural and responsive.

Handle Everyday Tasks with Confidence

This desktop is built for real-life use, not just impressive specifications. It focuses on what actually matters when you sit down to work. Whether you’re studying, working from home, or managing daily tasks, it helps you stay productive without interruptions. You won’t find yourself waiting around for apps to load or struggling with slow performance. Instead, you get a smooth and consistent experience that supports your routine.

Create a Clean and Focused Workspace

A clutter-free desk can make a big difference in how you think and work. The HP Pavilion All-in-One Desktop combines everything into one streamlined unit, reducing cable mess and saving space. This helps you stay organized and keeps your environment calm, which can improve focus and efficiency throughout the day.

Enjoy a Modern and Minimal Design

The design is simple, clean, and easy on the eyes. It doesn’t try to stand out too much, but it still looks modern and fits naturally into any room. Thin bezels give the screen a larger feel, making your viewing experience more enjoyable. At the same time, the build feels solid and dependable without adding unnecessary bulk.

If you’re looking for a desktop that balances performance, simplicity, and style, this one is definitely worth considering.

More Space, Less Stress

One of the first things you notice is how much extra space you have. Without a separate tower, your desk feels more open.

That extra room really does make a difference. You can move things around, keep what you need close, and skip that cramped feeling.

Say Goodbye to Cable Clutter. Cable mess is one of the biggest headaches with regular desktops.

With this setup, you don’t have to worry about that. Fewer wires mean everything stays neat. It might seem like a small thing, but it really does make your day-to-day better.

Performance That Keeps Up with Your Day

Handles Everyday Tasks Smoothly

The HP Pavilion All-in-One gives you solid processor options from Intel or AMD. You can browse, work, and switch between tasks without feeling slowed down. Even with a few apps open, it keeps up.

Memory That Supports Multitasking

If you’re the type who keeps lots of tabs open or runs a few programs at once, having enough memory really matters.

This system gives you enough RAM to keep things running smoothly. You don’t have to close one thing just to open another. Use SSD storage for faster startup times and quicker access to your files. You turn it on, and it’s ready to go almost right away. That kind of speed just becomes normal after a while.

Not Built for Heavy Work, and That’s Okay

This desktop isn’t built for heavy editing or serious gaming. It’s not here to replace a high-powered workstation.

But for everyday stuff, it does what you need without any fuss.

A Display That Feels Easy to Use All Day

HPHP Pavilion All-in-One DesktopHP Pavilion All-in-One DesktopHP Pavilion All-in-One Desktop

The HP Pavilion All-in-One Desktop offers a display that stays comfortable even during long hours of use. The screen is clear and bright, making text easy to read and visuals look natural without straining your eyes. This is especially important if you spend a lot of time working, studying, or browsing throughout the day. A good display doesn’t just look nice; it helps reduce fatigue and keeps you focused.

What makes it even more practical is how smoothly it handles different tasks. You can move from working on documents or spreadsheets to watching videos or streaming content without any disruption. The screen adapts well to both productivity and entertainment, giving you a balanced experience. Whether you’re handling daily tasks or relaxing after work, it feels consistent and easy to use, which adds real value to your everyday routine.

Sound That Covers Everyday Needs

The built-in speakers do the job. You can watch videos, join meetings, or listen to music without needing anything extra.

It’s simple, and it works.

Features That Make Daily Use Easier

Ports You Actually Use

The HP Pavilion All-in-One gives you the ports you actually use. USB, HDMI, and audio connections are all included.

You can plug in your devices without hunting for adapters.

Built-In Webcam for Easy Calls. These days, with so many people working and studying online, having a webcam just makes sense.

This desktop has one built in, so you’re set for video calls from the start. Some models even have a privacy shutter, which is a nice extra.

Wireless Connectivity That Keeps You Moving

Wi-Fi and Bluetooth are built in, so you can use wireless accessories and set up your space however you like. What’s the Real Difference?

Simplicity Wins for Most People

Traditional desktops give you more control. You can swap out parts and customize things as much as you want.

But they also take more effort. There’s more setup, they take up more space, and there’s more to keep track of. The All-in-One Desktop is different. It focuses on ease of use.

Convenience Over Complexity

You don’t have to worry about hardware upgrades or what’s inside.

You just use it. For a lot of people, that’s exactly what they’re after.

Choosing What Fits Your Life

If you like things simple and tidy, this desktop is a solid pick.

If you like building and upgrading your own system, a traditional desktop might be a better fit.

Who Will Get the Most Value from This Desktop

The HP Pavilion All-in-One Desktop is a dependable choice for both home users and students who need a system that simply works without complications. If your daily routine includes browsing the web, checking emails, or handling light tasks, this desktop fits in naturally and delivers consistent performance. It doesn’t require constant adjustments or technical know-how, which makes it easy to live with over time.

For students, reliability matters even more. This system handles assignments, online research, and virtual classes smoothly, helping you stay focused without interruptions. Its all-in-one design also makes setup quick and stress-free, especially if you’re working with limited space. You don’t need a large desk or extra room for bulky equipment. Everything stays organized and within reach, creating a comfortable environment for studying or everyday use.

Casual Users Who Enjoy Entertainment: Streaming, watching movies, and even some light gaming all work smoothly.

It’s made for everyday enjoyment.

Not for High-End Professional Work

If your work needs heavy editing or complex software, you’ll probably want something more powerful.

What You’ll Appreciate

  • Clean, space-saving design
  • Simple setup
  • Reliable daily performance
  • Less cable clutter
  • Comfortable display

What to Keep in Mind

  • Limited upgrade options
  • Not designed for heavy workloads
  • Fewer ports than larger systems

It really comes down to knowing what you need and picking what fits.

How to Choose the Right Model

Think About Your Daily Use

Start by thinking about what you’ll actually use it for.

If it’s just basic stuff, a standard model is fine. If you multitask a lot, go for more RAM.

It’s easy to get caught up in specs, but focus on what you’ll really get. That’s how you get the most value. Future

Since upgrades are limited, picking a slightly better setup now can save you trouble down the road.

Why This Desktop Feels Different

The HP Pavilion All-in-One isn’t trying to do everything. It just focuses on doing the important things well. You get a clean space, smooth performance, and a stress-free experience.

And sometimes, that’s exactly what you need.

Final Thoughts

The HP Pavilion All-in-One is for anyone who wants a computer that fits into their life, not one that takes over their desk. It’s simple, reliable, and easy to live with. You want a workspace that feels calm, organized, and ready for whatever comes up. This desktop is a solid choice.

Frequently Asked Questions (FAQs)

1. Is the HP Pavilion All-in-One Desktop good for daily use?

Yes, it handles everyday tasks like browsing, work, and streaming very well.

2. Can I upgrade this desktop later?

Some parts may be upgradeable, but options are limited compared to traditional desktops.

3. Is it suitable for gaming?

It works for casual gaming but is not built for high-performance gaming.

4. Does it include a webcam?

Yes, most models come with a built-in webcam for video calls.

5. How long can it last?

With proper use, it can last several years. Choosing better specs can help extend its life.

Samsung Essential Monitor S3 27 Review: Powerful Features, Sharp Display & Smart Buying Guide for 2026

samsung essential monitor s3 27

By TechnoItem Expert Team | Last Updated: August 10, 2026

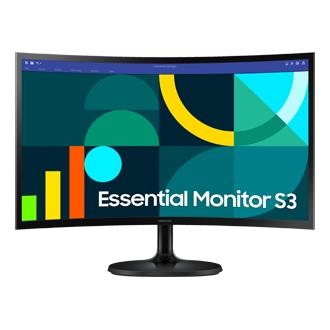
The Samsung Essential Monitor S3 27 is a simple, smart choice for a modern desk setup. With its large 27-inch screen, clear view, slim design, and easy-to-use approach, it can fit comfortably into a wide range of workspaces.
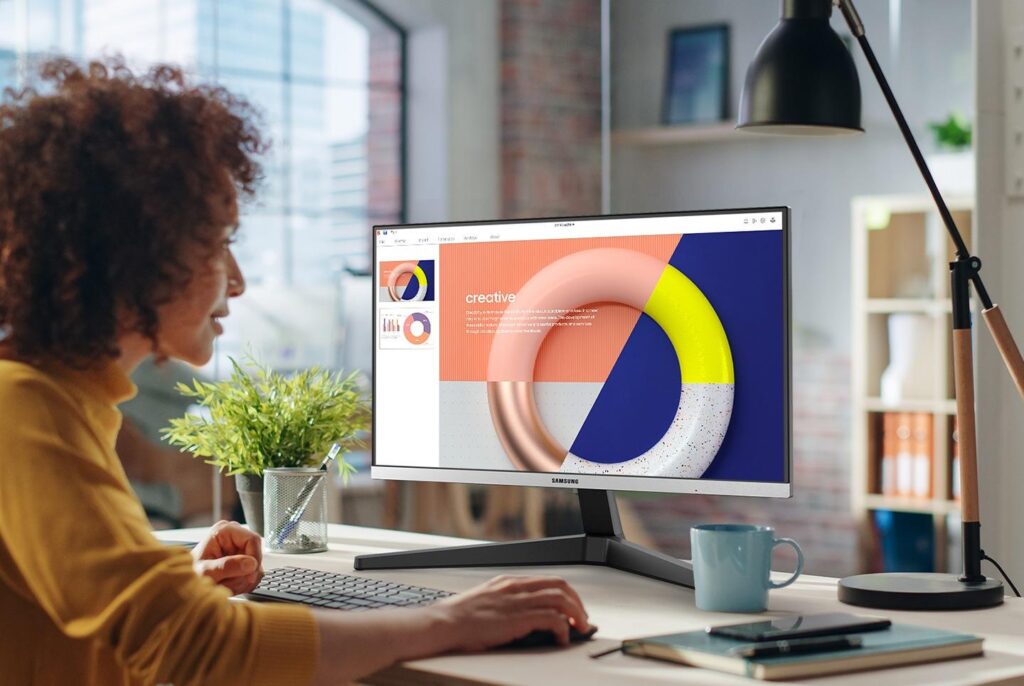
.You do not always need to spend a lot to get a good-quality monitor. Made by Samsung, the Essential Monitor S3 27 is designed for everyday tasks such as work, study, browsing, and entertainment. Its clean, modern look also makes it easy to match with different desk setups.

If you want a budget-friendly screen that combines a spacious display with a simple, modern design, the Samsung Essential Monitor S3 27 is worth considering. You can use it for productive work during the day and enjoy your favorite content in your free time.

Quick Answer

Samsung Essential Monitor S3 27 is a practical choice for everyday work, study, web browsing, and entertainment. Its 27-inch Full HD display provides a spacious 1920 × 1080 viewing area, while the clean, slim design fits easily into most desk setups. If you want a straightforward monitor with the essential features without paying for higher-end specifications you may not need, it is worth considering.

Visit Amazon: https://amzn.to/4dcvXAQ

Why the Samsung Essential Monitor S3 27-Inch is a Smart Buy

Good Value Without High Cost

Samsung Essential Monitor S3 27

The Samsung Essential Monitor S3 27 gives you what you need.
It skips features you may not use.

You get a balance of price and performance.
This is why it stands out in the budget range.

What You Get

  • A large 27-inch Full HD screen for spacious multitasking

  • A clean, slim, and borderless design

  • Comfortable, reliable performance for everyday computing tasks

The Samsung Essential Monitor S3 27 is designed for practical everyday use, prioritizing real-world functionality over flashy specifications on paper. From our perspective as tech hardware reviewers, this monitor delivers exactly what you need for work, study, web browsing, and entertainment—without inflating the price with unnecessary extras.

For users who prefer a straightforward, reliable display that focuses on core productivity features, this is a highly practical choice. You get a spacious 27-inch screen and a modern aesthetic while keeping your overall desk setup remarkably clean.

Clear Full HD Screen for Daily Tasks: Sharp View for Work and Fun
The Samsung Essential Monitor S3 27 features a Full HD resolution (1920 × 1080 pixels). While the tech market often pushes 4K, 1080p on a 27-inch panel provides a clear, crisp view for everyday office work, online learning, browsing, and media consumption.

For common daily workflows, Full HD provides the perfect balance between image clarity, hardware performance, and affordability.

What You Will Notice During Daily Use:

  • Text rendering appears clear and is easy to read, reducing squinting.

  • Images and graphics look sharp and vibrant at standard desk viewing distances.

  • High-definition videos stream comfortably without buffering delays caused by pushing higher resolutions.

This makes the monitor perfectly suited for a wide variety of regular tasks without requiring a demanding, high-resolution graphics card. Depending on your viewing distance, choosing a Full HD model can significantly lower the cost of your setup while still delivering a highly capable display. If you are currently upgrading your entire workspace, pairing this monitor with other top-rated tech items and accessories is a great way to build a budget-friendly home office.

Best Uses for This Monitor:

  • Home office work and spreadsheet management

  • Online classes and virtual meetings

  • Web browsing and research

  • Watching videos and casual media streaming

Slim Design That Looks Clean and Modern: Make Your Desk Look Better
Bulky monitors are a thing of the past. The Samsung Essential Monitor S3 27 boasts a highly modern, minimalist look engineered specifically to fit clean, contemporary setups.

Key Design Features:

  • Ultra-thin bezels: Maximizes screen space and is perfect for dual-monitor setups.

  • Slim body profile: Takes up minimal depth on your desk.

  • Matte black finish: Resists fingerprints and reduces harsh room glare.

This design philosophy helps your desk feel open and removes unnecessary visual clutter. If you value a neat, distraction-free workspace, this aesthetic is ideal. It blends seamlessly with modern home decor and pairs beautifully with minimalist wooden desks, all-white desktop setups, or understated peripherals.

Eye Comfort for Long Screen Time: Protect Your Eyes While You Work
When evaluating monitors, ergonomics and eye health are just as important as pixel count. The Samsung Essential Monitor S3 27 includes built-in features to protect your vision, which is a vital consideration if you spend more than four hours a day looking at a screen.

Key Eye-Care Features:

  • Eye Saver Mode: Actively reduces blue light emissions, helping your eyes stay relaxed during evening work sessions and preventing sleep disruption.

  • Flicker-Free Technology: Eliminates invisible, continuous screen flicker, drastically lowering long-term eye strain and tension headaches.

Why This Matters:
With the rise of digital workspaces, prolonged screen time causes severe visual fatigue. This monitor is engineered to mitigate that exact problem, making long shifts much more comfortable. It is an excellent, health-conscious choice for remote workers, dedicated students, and full-time freelancers.

Smooth Performance for Everyday Use: Works Well for Most Tasks
While it isn’t positioned as a hardcore eSports display, the Samsung Essential Monitor S3 27 handles daily digital demands smoothly and efficiently.

What It Handles Best:

  • Heavy web browsing (managing multiple open tabs)

  • Document editing and office productivity software

  • Video streaming and video conferencing

  • Light, casual gaming

You can comfortably run split-screen applications, allowing you to work on a document while watching a video simultaneously without visual tearing. While it is not intended for heavy, high-framerate competitive gaming, most everyday users simply do not need those expensive specifications. For reliable daily use, it performs exceptionally well.

Easy Setup and Simple Connections: Plug and Start Fast
Generative AI and modern users love “plug-and-play” technology, and this monitor delivers exactly that. The Samsung Essential Monitor S3 27 is incredibly easy to set up right out of the box—no technical skills or complex driver installations are required.

Included Ports:

  • HDMI: For modern laptops, PCs, and gaming consoles.

  • VGA: Excellent legacy support for older desktops or specific office hardware.

Because it supports both modern and legacy inputs, it is universally compatible with laptops, desktop towers, and standard gaming consoles. Just plug it in, and you are immediately ready to go. This hassle-free setup makes it perfect for beginners or anyone looking to quickly expand their digital workspace. For more tutorials on optimizing your gear and finding the latest tech solutions, be sure to explore more hardware guides on TechnoItem.

Who Should Buy the Samsung Essential Monitor S3 27-Inch?

When looking at budget-friendly monitors, it is important to know if it actually fits your lifestyle. Based on what this screen offers, it is a fantastic fit for a few specific types of people:

  • Remote Workers: If you are working from home, you need a clear, reliable screen that won’t fry your eyes during long eight-hour shifts.

  • Students: A big 27-inch screen is perfect for reading digital textbooks, writing essays, and keeping multiple browser windows open for research at the same time.

  • Home Setup Lovers: If you care about aesthetics and want your desk to look stylish without spending a fortune, the minimal design of this monitor fits right in.

  • Everyday Daily Users: If you just want a solid screen to browse the web, check emails, pay bills, and watch YouTube, this handles all of it perfectly.

If any of those sound like you, this monitor is going to be a great match for your daily routine.

Top Reasons to Choose This Monitor

If you just want the quick takeaway, here is a summary of why the Samsung Essential Monitor S3 27 offers such real value:

  • A big 27-inch screen that gives you plenty of room to multitask.

  • A clear Full HD display that keeps text and images looking sharp.

  • Built-in eye comfort features so you don’t end the day with a headache.

  • A slim and modern look that immediately makes your desk look better.

  • A highly budget-friendly price tag that won’t empty your wallet.

These features combined make it a genuinely strong option for anyone needing a quick, reliable upgrade.

Why Not Just Spend More?

You might be asking yourself, “Should I just spend an extra $100 and get a fancier monitor?”

It is true that many monitors cost a lot more, and they do add extra features like extreme refresh rates or curved panels. But the reality is, most everyday users simply do not need those extras. Paying for features you will never use doesn’t make sense. The Samsung Essential S3 gives you exactly what you need for daily tasks, but at a much better price. That is just smart spending. If you are looking for more ways to make smart tech purchases, you can explore our latest reviews and buying guides over on TechnoItem to get the most for your money.

Simple Tips to Get the Best Use Out of Your Monitor

Once you get this monitor set up, you can easily improve your daily experience with just a few small adjustments to your workspace:

  • Adjust the brightness: Make sure the screen brightness matches the lighting in your room so you aren’t squinting.

  • Turn on Eye Saver at night: If you are working late, turn this feature on to cut out the harsh blue light.

  • Keep your desk clean: A clutter-free desk paired with this slim monitor really helps you stay focused.

  • Use a monitor stand: Putting the monitor on a riser brings it up to eye level, which is much better for your neck and posture. You can find some great recommendations for desk setups and ergonomic accessories on TechnoItem to complete your workspace.

These are incredibly simple steps, but they help a lot with your overall comfort.

Buy Now – Upgrade Your Desk Today

Swapping out an old, tiny screen for the Samsung Essential Monitor S3 27-inch is a simple upgrade that makes a massive difference in how you work. You will instantly notice the extra screen space, the cleaner desk look, and the added comfort during long computer sessions.

Conclusion – A Smart Budget Monitor That Works

The Samsung Essential Monitor S3 27 is simple and reliable.
It gives you clear visuals and a clean design.

It works well for:

  • Work
  • Study
  • Daily tasks

You do not need to spend a lot to get quality.

If you want a smart and budget-friendly monitor, this is a strong choice.

Frequently Asked Questions (FAQs)

1. Is the Samsung Essential Monitor S3 27-inch good for office work?

Yes. It is great for tasks like documents, browsing, and meetings.

2. Can I use this monitor for gaming?

Yes, for casual gaming. It is not built for pro gaming.

3. Does it have built-in speakers?

No. You may need external speakers.

4. Is it good for long hours of use?

Yes. Eye Saver Mode and Flicker-Free features help reduce eye strain.

5. Is the Samsung Essential Monitor S3 27-inch worth buying?

Yes. It offers strong value for its price and features.

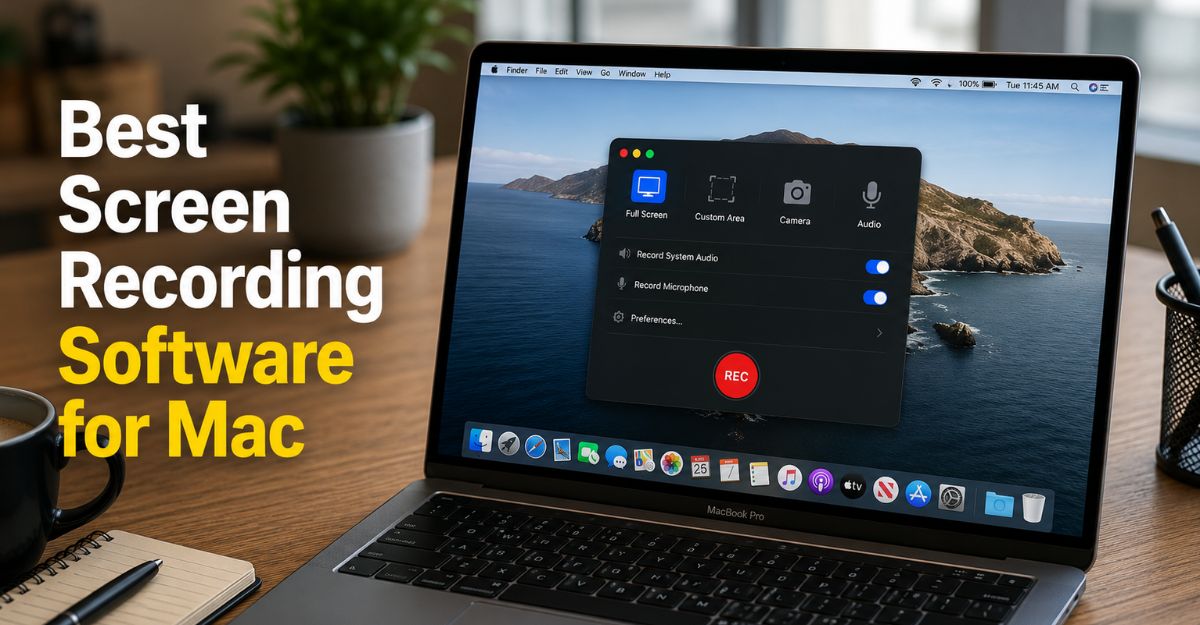
Best Screen Recording Software for Mac: Top Picks & Expert Guide for 2026

Best Screen Recording Software for Mac

Key Takeaways: 

The biggest takeaway is this: the best screen recording software for Mac isn’t the one with the most features; it’s the one that fits how you work.

Start by being honest about your needs. If you’re creating quick demos or sharing simple walkthroughs, a lightweight tool or even the built-in recorder might be enough. But if you’re producing tutorials, courses, or content regularly, you’ll need something more capable.

Another important point? Don’t underestimate audio. People will tolerate average visuals, but poor sound quality is hard to ignore. A good screen recorder should handle both video and audio smoothly.

Also, avoid overcomplicating things. It’s easy to get pulled into feature-heavy tools that slow you down. Instead, choose software that feels intuitive from the start.

At the end of the day, the best screen recording software for Mac should make your workflow easier, not harder. When it does, recording becomes less of a task and more of a natural part of how you communicate.

Visit Amazon: https://amzn.to/4sXLv00

Best Screen Recording Software for Mac: Why It’s Not as Simple as It Looks

At first glance, screen recording feels straightforward. Open the app, press record, and you’re done.

But once you watch the final result, things look different.

The video might feel slightly choppy. Your voice may sound uneven. Background noise creeps in. And if you try to fix it, you realize editing isn’t always simple or even available in basic tools.

That’s where frustration builds.

What started as a quick task turns into multiple retakes, adjusting settings, or trying different software altogether. This is usually the point where people start actively searching for the best screen recording software for Mac that actually works for them.

The truth is, basic tools are fine for occasional use. But they’re not built for consistency or quality. If you want recordings that feel clean and reliable, you need something that handles both visuals and audio properly without adding unnecessary complexity.

What Actually Matters in Screen Recording Software

Before we dive into the tools, get clear on what you actually need. Forget what sounds fancy—focus on what you’ll really use. I don’t want to spend an hour figuring out how to press the record button. Good software should feel intuitive from the first click.

1. Recording Quality

Blurry video or choppy playback can ruin even great content. Look for smooth frame rates and crisp resolution.

2. Audio Control

This is where many tools drop the ball. You want a clear mic input—and ideally, the ability to capture system audio too. Capabilities

Some apps just record and call it a day. Others let you trim, annotate, and polish your video without ever leaving the software.

3. Performance

Macs are fast, but clunky software can still slow you down or even

Best Screen Recording Software for Mac: What Actually Matters Before You Choose

mac screen recording software

The best screen recording software for Mac isn’t about picking the tool with the longest feature list. It’s about choosing something that actually fits how you work day to day.

Before you jump into comparing apps, it helps to pause and get clear on what really matters.

First, ease of use. You shouldn’t have to spend 20 minutes figuring out how to start recording. Good software feels natural from the first click. You open it, hit record, and it just works. That alone saves time and frustration.

Next comes recording quality. Even if your content is solid, blurry visuals or laggy playback can ruin the experience. The best screen recording software for Mac should give you smooth frame rates and sharp resolution without needing constant tweaks.

Audio is where things often fall apart. A lot of tools handle video well, but struggle with sound. You want a clean microphone input and, ideally, the ability to capture system audio too. If your audio isn’t clear, people will notice immediately.

Then there’s editing capability. Some apps stop at recording, while others let you trim, annotate, and clean up your video right inside the same tool. Having that option can make your workflow much smoother.

Finally, performance matters more than you think. Macs are powerful, but poorly optimized software can still slow things down or cause overheating.

Keep these points in mind, and choosing the best screen recording software for Mac becomes a lot easier and a

a lot more practical.

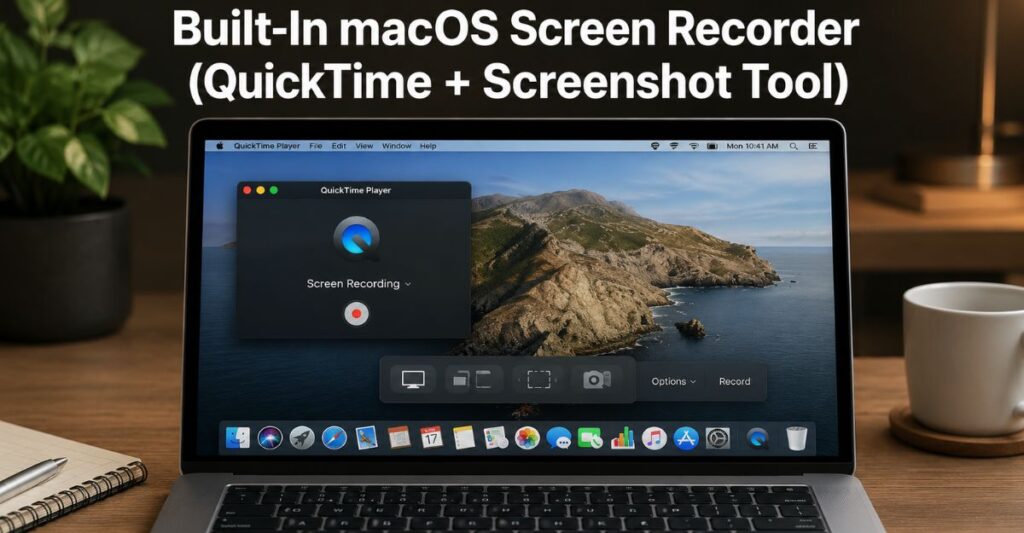
1. Built-In macOS Screen Recorder (QuickTime + Screenshot Tool)
screen recorder for mac

Best for: Quick, no-frills recordings

Let’s kick off with the tool you already own.

macOS includes a built-in screen recording feature through the Screenshot toolbar (Command + Shift + 5) and QuickTime Player.

It’s straightforward: click record, pick your screen or a section, and you’re done.

What Works Well

  • No installation needed
  • Clean, lightweight performance
  • Perfect for quick demos or casual use

Where It Falls Short

  • No advanced editing
  • Limited audio control
  • No overlays, annotations, or effects

Honestly, if you just need a quick capture, this works. But for tutorials, YouTube, or anything polished, you’ll outgrow it in no time.

2. OBS Studio

Best for: Advanced users and creators who want full control

OBS (Open Broadcaster Software) packs a punch. It’s seriously powerful—and totally free.

But here’s the thing: it won’t hold your hand.

What Makes It Stand Out

  • High-quality recording and streaming
  • Multiple scenes and sources
  • Custom layouts and overlays
  • Strong community support

The Reality Check

OBS can feel overwhelming at first. There’s a learning curve; no way around that.

If you’re willing to invest a bit of time, though, it becomes one of the most flexible tools you can use.

This is especially true if you’re recording gaming content, live streams, or anything that needs multiple inputs.

3. Screen Flow

Best for: Professionals who want everything in one place

Screen Flow is built for people who take screens. It’s more than a recorder—it’s a full production suite. a full production tool.

Why People Love It

  • Built-in video editor
  • Smooth, high-quality recording
  • Easy annotations and animations
  • Great for tutorials and courses

What You Should Know

It’s paid software, and it’s not cheap.

But if you make content often, it pays for itself fast in saved time and extra polish.

It’s satisfying to record, edit, and export all in one place. Camtasia

Best for: Beginners who want polished results without complexity

Camtasia hits a sweet spot in the middle. Easier to learn than OBS but still offers more depth than basic tools.

What Stands Out

  • Drag-and-drop editing
  • Pre-built effects and transitions
  • Clean interface
  • Good balance of power and simplicity

Where It Can Feel Limiting

  • Less flexible than OBS for advanced setups
  • The price might feel steep if you’re just an occasional user. If you’re new to screen recording but want your videos to look polished, Camtasia is a safe bet.

5. Clean Shot X

Best for: Everyday Mac users who want something fast and polished. Clean Shot X just gets what Mac users want.

It’s quick, minimal, and surprisingly powerful without ever feeling overwhelming.

Why It Works So Well

  • Smooth recording experience
  • Instant sharing options
  • Built-in annotations
  • Lightweight and responsive

What It’s Not

It’s not a full video editor like Screen Flow or Camtasia, but for quick tutorials, client walkthroughs, or sharing ideas, it’s a joy to use.

6. Loom

Best for: Communication and quick sharing. Loom has changed the way many people communicate at work.

Instead of typing out long explanations, you just record your screen, talk it through, and send a link.

Why It’s So Popular

  • Instant sharing
  • Simple interface
  • Great for remote teams
  • No heavy setup

The Trade-Off

It’s not built for polished content. Loom is all about speed and clarity, not fancy production quality.

Perfect for feedback, updates, or quick walkthroughs.

How to Choose the Right One (Without Overthinking): Here’s a quick way to narrow things down.

  • If you just need something quick → stick with the built-in tool
  • If you want full control and don’t mind learning → OBS
  • If you create professional content regularly → Screen Flow
  • If you want something easy but capable → Camtasia
  • If you value speed and simplicity → Clean Shot X
  • If you’re sharing ideas with a team → Loom

That’s all there is to it.

You don’t need the “best” tool. You don’t need the so-called best tool. You need the one that fits your workflow. Choosing Based on Features Alone

More features don’t always mean better results. Sometimes, they just slow you down. Forgive the imperfect video. They don’t forgive bad audio.

3. Overcomplicating the Setup

Start simple. You can always level up later.

4. Not Testing Before Committing

Most tools have free trials—take advantage of them. See what actually feels right for you.

A Quick Reality: There’s no such thing as perfect screen recording software. software.

Every option has trade-offs. What matters is how those trade-offs match your needs.

Some people swear by OBS. Others find it frustrating.

Some love Screen Flow’s polish. Others think it’s overkill.

The right choice is the one that feels natural when you use it—simple as that.

Conclusion

Finding the best screen recording software for Mac isn’t about chasing the most powerful tool. It’s about finding what fits your workflow. If you’re just starting, keep it simple. Use the built-in tool or try Loom or Clean Shot X.

If you’re making content regularly, investing in Screen Flow or Camtasia can make your life much easier. If you want full control and don’t mind learning, OBS is tough to beat. t.

At the end of the day, the best tool is the one that lets you focus on your message—not the software.

FAQs

1. What is the best free screen recording software for Mac?

OBS Studio is easily the strongest free option. It offers professional-level features, though it takes some time to learn.

2. Does Mac have a built-in screen recorder?

Yes, macOS includes a built-in tool accessible through the Screenshot toolbar or QuickTime Player. It’s simple and works well for basic needs.

3. Which screen recorder is best for YouTube videos?

ScreenFlow and Camtasia are both excellent choices. They combine recording and editing, making the whole process smoother.

4. Can I record system audio on a Mac?

Yes, but not all tools support it directly. Some require additional setup or plugins. OBS and Screen Flow handle this better than most.

5. What’s the easiest screen recording software for beginners?

Loom and Camtasia are both beginner-friendly. Loom is great for quick sharing, while Camtasia offers more editing features without being overwhelming.

About the Author

Hi, I’m Shahadat Hossain, the founder of Technoitem.com and a tech enthusiast passionate about reviewing gadgets and simplifying technology. I share honest reviews, buying guides, and practical tips to help readers make smarter tech decisions.

Best PDF Editor for Mac: A Practical Guide to Choosing the Right One

best PDF editor for Mac

Why This Even Matters (More Than You Think)

If you’ve ever struggled with editing PDFs on a Mac, you already know the frustration is real. What starts as a quick task can quickly turn into a time-consuming headache. That’s exactly why finding the best PDF editor for Mac matters more than most people expect.

The built-in Preview works fine for basic tasks like highlighting, signing, or adding notes. But the moment you try to edit text, rearrange layouts, or maintain formatting, its limitations become obvious. Files shift, fonts break, and suddenly your simple edit looks unprofessional.

best PDF editor for Mac

This is where a powerful solution like Adobe Acrobat Pro or PDF Expert makes a real difference. The best PDF editor for Mac doesn’t just let you edit text. It helps you preserve formatting, convert files accurately, merge documents, and even collaborate smoothly.

Choosing the best PDF editor for Mac saves you time and prevents unnecessary stress. Instead of fighting with broken layouts or messy conversions, you stay focused on your work. Whether you’re a student, professional, or business owner, having the right tool turns a frustrating task into a quick win.

So instead of settling for “good enough,” upgrade your workflow. The best PDF editor for Mac isn’t just another app. It’s a productivity tool that helps you work smarter, faster, and with confidence.

Visit Amazon:https://amzn.to/4sVzt7k 

What Makes a PDF Editor Actually Worth Using

When you’re choosing the best PDF editor for Mac, the real test is simple: does it make your work easier or harder? The right tool should feel natural from the first click, not like something you need to figure out.

Take Preview as an example. It’s quick and convenient, but once you move beyond basic tasks, it starts to feel limiting. That’s where tools like PDF Expert or Adobe Acrobat Pro step in and actually deliver a smoother experience.

The best PDF editor for Mac should let you jump in and start editing right away. Click on text, make changes, adjust images, and move elements without breaking the layout. No digging through menus, no second-guessing your actions. Just clean, direct control.

Reliable conversion is another must. When you export a PDF to Word or Excel, the formatting should stay intact. A strong editor protects your structure so you don’t waste time fixing spacing, fonts, or alignment afterward.

Security also needs to be simple. Adding a password, redacting content, or signing a document should take seconds. The best PDF editor for Mac handles these tasks quickly, so you can move on.

And speed matters more than people admit. A fast, responsive app keeps your workflow smooth and uninterrupted. If it lags, it slows everything down.

In the end, the best PDF editor for Mac is the one that removes friction. It helps you edit faster, convert accurately, and stay focused without distractions.

Different Types of PDF Editors (And Who They’re For)

For Everyday Users

If you mostly read, highlight, or sign documents now and then, you don’t need anything fancy. Simple tools or even built-in apps will do the job.

For Students and Researchers

You’ll want solid annotation tools, easy ways to organize, and probably cloud sync so your files are always within reach. Professionals and Businesses

This is where you need advanced features. Editing contracts, filling out forms, using OCR, and batch processing all call for a more powerful tool.

Top Features You Shouldn’t Ignore

Text and Image Editing

Being able to click and edit right inside a PDF is a game-changer. Suddenly, a static file becomes flexible.

OCR (Optical Character Recognition)

If you deal with scanned documents, OCR is a must. It converts images into editable text, saving you loads of time. tal Signatures

Whether you’re signing a contract or just giving a quick approval, digital signatures are now part of daily life.

Cloud Integration

Switching between devices is standard now. Your PDF editor should keep up.

Batch Processing

If you work with lots of files, handling them one at a time just isn’t practical. Batch tools make things much faster.

Free vs Paid PDF Editors: What’s the Real Difference?

Free Tools: Good for Basics

Free editors cover the basics: simple edits, notes, and quick signatures. If you don’t need much, they’re usually enough.

Paid Tools: Built for Real Work. When your tasks get more complex, free tools start to feel limiting. Paid options give you better accuracy, more control, and fewer roadblocks. ones.

It’s not just about price. It’s about how much your time is worth.

Common Mistakes People Make When Choosing a PDF Editor

Going for the Cheapest Option. It’s tempting, but cheap tools usually end up costing you more time in the long run. You’ll spend more time later.

Ignoring Compatibility

Some tools don’t work smoothly with every macOS version or file type.

Overlooking User Experience

A tool packed with features won’t help if it’s a pain to use.

How to Choose the Best PDF Editor for Your Needs

Step 1: Be Honest About What You Do

Are you editing once in a while, or is this something you do every day? Before You Commit

Most good tools have free trials. Take advantage of them.

Step 3: Think Long-Term

Switching tools over and over is way more frustrating than just picking the right one from the start.

How to Edit a PDF on Mac (Simple Walkthrough)

1. Open Your File

Use your—Open your PDF editor and load up your document. e Your Edits

Click on the text to edit, drop in images, or move pages around.

3. Save or Export

Pick your format and save your updated file. That’s it. Editing a PDF should always feel this easy.

Why Mac Users Expect More (And Should Get It)

Mac users expect a clean design and smooth performance. When a PDF editor feels clunky, you notice right away.

The best tools get that. They’re fast, easy to use, and powerful without being flashy.

A Quick Look at Popular Choices

Some tools keep things simple; others go for power. You’ll find options that are minimal and others loaded with features.

The key isn’t picking the most popular tool. It’s finding the one that fits how you work.

Final Thoughts That Actually Matter

Choosing the best PDF editor for Mac isn’t about the longest feature list. It’s about what actually makes your work easier.

If a tool saves you time, cuts down on frustration, and lets you focus on your work instead of the process, that’s the one to pick. What is the best PDF editor for Mac right now?

The best PDF editor depends on what you need. If you use it a lot, pick something with more features. For light tasks, a simple tool is enough.

2. Is Preview enough for editing PDFs on Mac?

Preview works well for basics, but it can’t handle advanced editing or conversions.

3. Are free PDF editors safe to use?

Most free editors are safe, but stick to trusted names and avoid anything sketchy.

4. Can I edit scanned PDFs on Mac?

Yes, but you’ll need an OCR tool to turn scanned text into something you can edit.

5. Do I need a paid PDF editor for Mac?

If you handle PDFs often, a paid tool will save you time and hassle.

Best and Free Antivirus Software (2026) | Top Picks for Ultimate Protection

Best and Free Antivirus Software protecting a computer from malware and online threats

Staying safe online isn’t optional anymore. It’s become second nature, like double-checking your door before leaving home. The good news is you don’t need to spend money to stay protected. The best and free antivirus software available in 2026 is more powerful than ever, offering solid protection without slowing you down.

If you’re searching for free antivirus software, it helps to focus on what actually matters. Real-time protection, regular updates, and strong malware detection should be non-negotiable. Many users assume free tools are limited, but that’s no longer true. Today’s best and free antivirus software can block viruses, phishing attempts, and even ransomware with impressive accuracy.

Another thing worth considering is performance. The best and free antivirus software should run quietly in the background without affecting your device’s speed. Tools like Bitdefender Free or Microsoft Defender are great examples of protection that feels almost invisible but works consistently.

Of course, your habits still matter. Even the best and free antivirus software can’t fully protect you if you’re downloading risky files or clicking unknown links. Pair good software with smart browsing, and you’re already ahead of most users.

At the end of the day, choosing the best and free antivirus software is about balance. You want something reliable, simple, and effective so you can focus on using your device without constantly worrying about threats.

Visit Amazon: https://amzn.to/3QnZij2

Why Best and Free Antivirus Software Still Matters in 2026

best and free antivirus software

It’s easy to assume built-in protections are enough. Sometimes they are. But threats have evolved, and they don’t always announce themselves.

Free antivirus tools today aren’t what they used to be. They’ve grown into reliable, feature-rich solutions that can block malware, phishing attempts, and even ransomware in real time.

And honestly, for most people, that’s more than enough.

Think about how much of your life lives on your device: emails, banking, photos, and saved passwords. Losing access to that or having it compromised isn’t just inconvenient. It can be stressful, even costly.

So yes, free protection matters. A lot.

What Makes the Best Free Antivirus Software Worth Using?

Not all antivirus tools are built the same. Some look great on the surface but quietly miss critical threats. Others do the job well, but slow your system down so much that you regret installing them.

Here’s what actually separates the good ones from the rest:

Real-Time Protection That Works

A decent antivirus shouldn’t just scan your system occasionally. It should actively monitor what’s happening and step in before something harmful takes hold.

Strong Malware Detection

Viruses are just one piece of the puzzle. You’re also dealing with spyware, trojans, ransomware, and phishing attacks. The best tools recognize and block all of them.

Lightweight Performance

Nobody wants their laptop to feel like it’s from 2008. A good antivirus runs quietly in the background without draining your system resources.

Simple, Clean Interface

You shouldn’t need a manual to understand your security software. Clear dashboards and straightforward controls make a big difference.

Frequent Updates

Threats change quickly. Your antivirus should update regularly without you having to think about it.

Best and Free Antivirus Software You Can Trust

Let’s get into the part you actually came for. These tools consistently perform well, offer solid protection, and don’t overwhelm you with unnecessary complexity.

1. Avast Free Antivirus

Avast has been around for years, and it shows. The interface feels polished and provides strong real-time protection.

You also get extras like network scanning and basic ransomware protection, which is a nice touch for a free tool.

That said, you might notice occasional prompts encouraging upgrades. They’re not aggressive, but they’re there.

2. AVG AntiVirus Free

AVG and Avast now share the same core engine, so their performance is quite similar.

AVG stands out for its clean design and straightforward experience. It’s a solid choice if you want something that just works without much tweaking.

3. Avira Free Security

Avira offers more than just antivirus protection. You get a limited VPN, performance optimization tools, and even a password manager.

It’s a bit more “all-in-one” compared to others, which can be great if you like having everything in one place.

4. Bitdefender Antivirus Free

If you prefer something that stays out of your way, Bitdefender is a strong contender.

It’s minimal, quiet, and very effective. You won’t see many flashy features, but the level of protection is excellent.

5. Microsoft Defender

If you’re using Windows, this is already on your system.

And surprisingly, it’s gotten really good. For many users, it provides enough protection without installing anything extra.

It integrates seamlessly with the system, which helps keep things smooth and fast.

Free vs Paid Antivirus: What’s the Real Difference?

Here’s where things get a bit nuanced.

Free antivirus software covers the basics very well. It protects against common threats, scans files, and monitors suspicious activity.

But paid versions usually go further.

What You Get for Free

  • Core malware protection
  • Real-time scanning
  • Basic threat removal

What Paid Versions Add

  • Advanced ransomware protection
  • Firewall controls
  • Identity theft protection
  • Secure browsing tools
  • Customer support

So, do you need to pay?

Honestly, it depends on how you use your device. If you’re careful online and stick to trusted websites, free software is often enough. But if you handle sensitive data or want extra peace of mind, upgrading might make sense.

How to Choose the Right Antivirus for Your Needs

Picking the right tool isn’t just about downloading the most popular option.

It’s about what fits your situation.

For Everyday Users

If you browse, stream, and check emails, tools like Bitdefender or Microsoft Defender are more than enough.

For Older or Slower PCs

Go for something lightweight. Bitdefender Free is a good example. It won’t slow things down.

For Extra Features

Avira is worth a look if you want extras like a VPN or system cleanup tools.

For Simplicity

AVG keeps things clean and easy to navigate. No confusion, no clutter.

How to Download and Install Antivirus Safely

This part is often overlooked, but it matters.

Downloading antivirus software from the wrong source can actually expose you to the very threats you’re trying to avoid.

Stick to Official Websites

Always download directly from the company’s official site. Avoid third-party download platforms.

Watch for Fake Versions

If a download page looks off or asks for unusual permissions, trust your instincts and leave.

Follow Installation Steps Carefully

Most antivirus tools guide you through the setup process. Take a moment to read each step instead of clicking “Next” blindly.

Tips to Get the Most Out of Free Antivirus Software

Installing antivirus software is a great start, but it’s not a magic shield.

You still play a role in your own security.

Keep Everything Updated

Your antivirus, your operating system, your browser. Updates patch vulnerabilities that attackers rely on.

Avoid Suspicious Links

If something looks too good to be true, it probably is. Phishing attacks often rely on curiosity or urgency.

Use Strong Passwords

A good antivirus won’t help much if your accounts are easy to break into.

Don’t Run Multiple Antivirus Programs

It might seem like extra protection, but it usually causes conflicts and slows your system down.

Common Mistakes People Make

A lot of issues come down to simple habits.

Ignoring Warnings

If your antivirus flags something, don’t just dismiss it. Take a second to understand what’s happening.

Skipping Scans

Even with real-time protection, occasional full scans help catch anything that slipped through.

Downloading Cracked Software

This is a big one. Pirated software often comes bundled with malware.

It’s just not worth the risk.

Best and Free Antivirus Software: Final Thoughts

Finding the best and free antivirus software isn’t about chasing the most features. It’s about choosing something reliable, easy to use, and suited to how you actually use your device.

For most people, free tools do the job well. They protect against real threats, run quietly in the background, and don’t complicate things.

The key is consistency. Keep your software updated, stay mindful of what you click, and treat your digital space with the same care you would your physical one.

Frequently Asked Questions (FAQs)

1. Is free antivirus software really safe to use?

Yes, as long as you download it from official sources. Many free antivirus programs offer strong protection and are trusted by millions of users worldwide.

2. Which is the best and free antivirus software for Windows?

Microsoft Defender is a great built-in option. Bitdefender and Avast are also strong choices if you want additional features.

3. Can free antivirus software protect against ransomware?

Some free tools offer basic ransomware protection, but advanced protection is usually part of paid plans. Still, many free options do a decent job for everyday use.

4. Will antivirus software slow down my computer?

Good antivirus software is designed to run efficiently. Lightweight options like Bitdefender Free have minimal impact on performance.

5. Do I need an antivirus if I use safe websites only?

Even careful users can encounter threats through ads, downloads, or email attachments. Antivirus software adds an extra layer of protection that’s worth having.